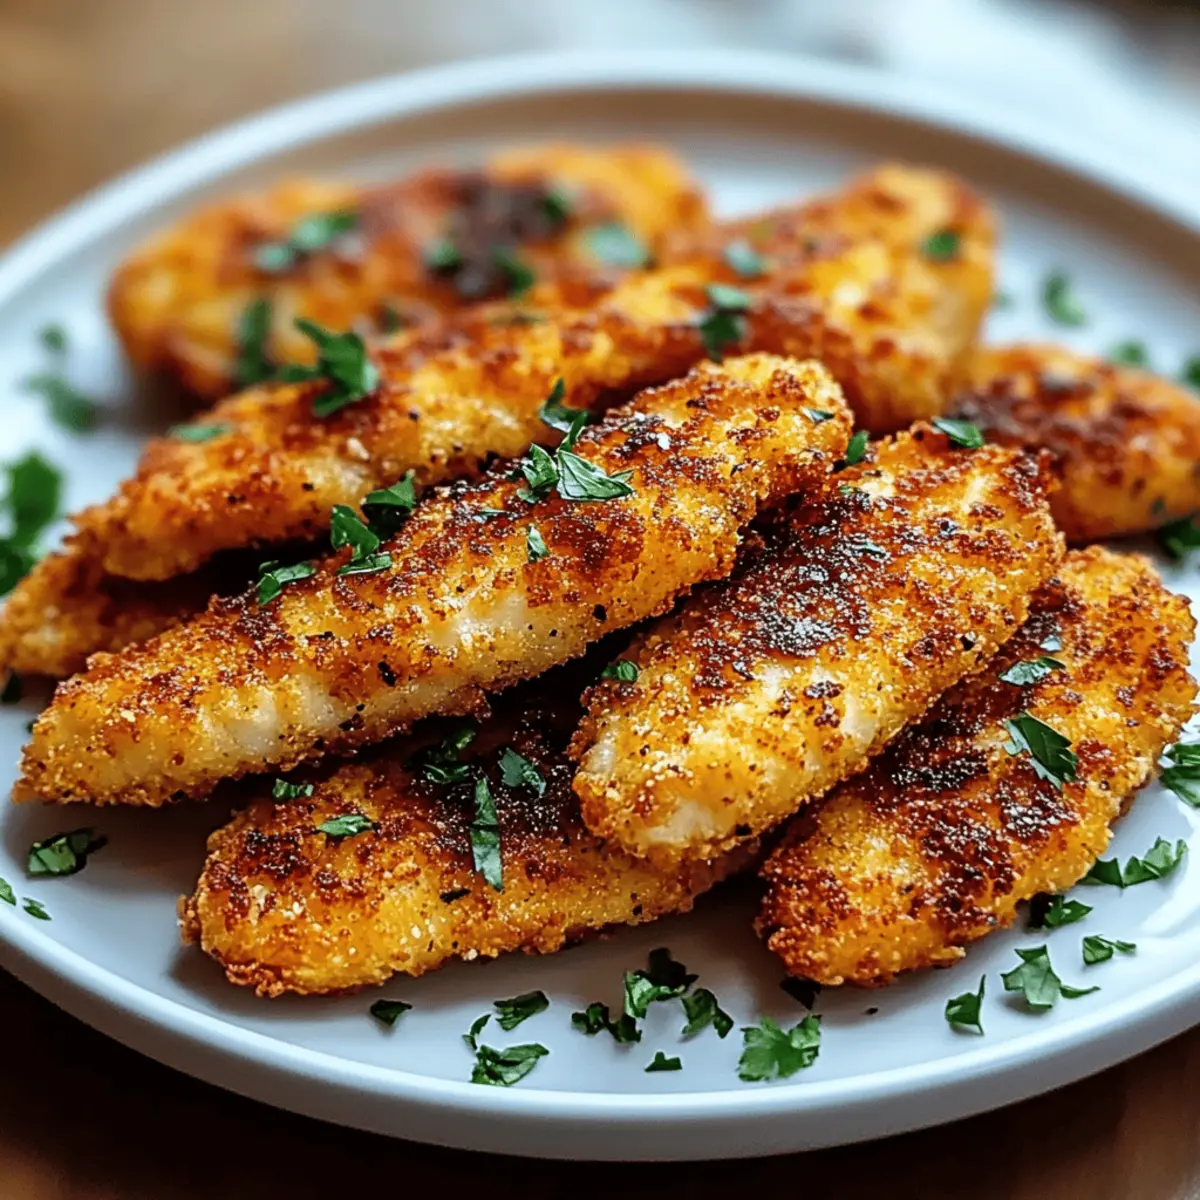
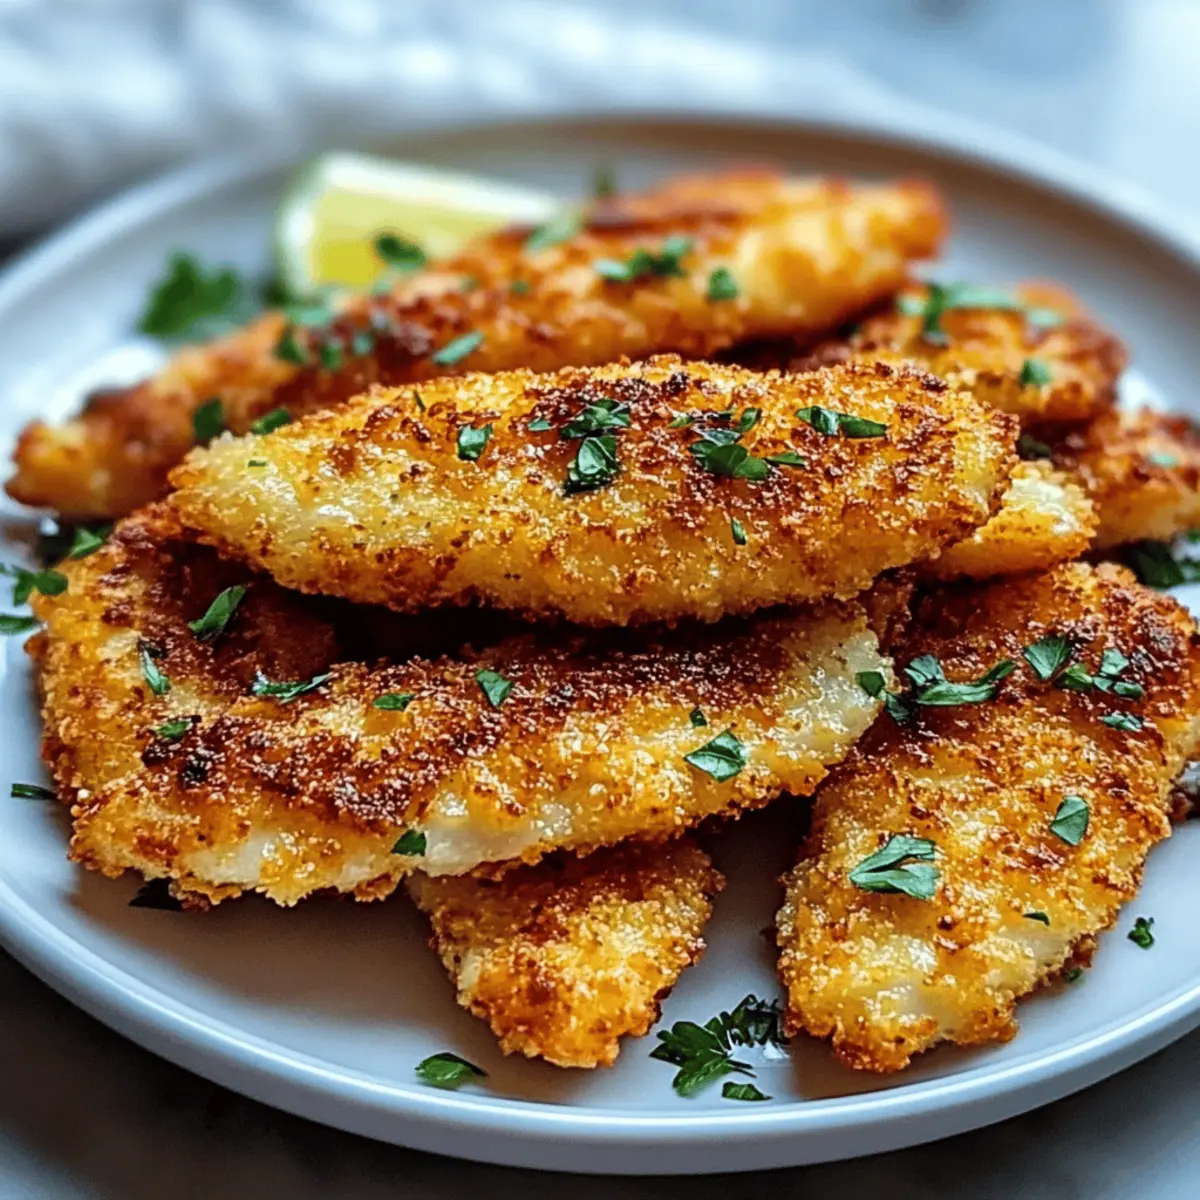
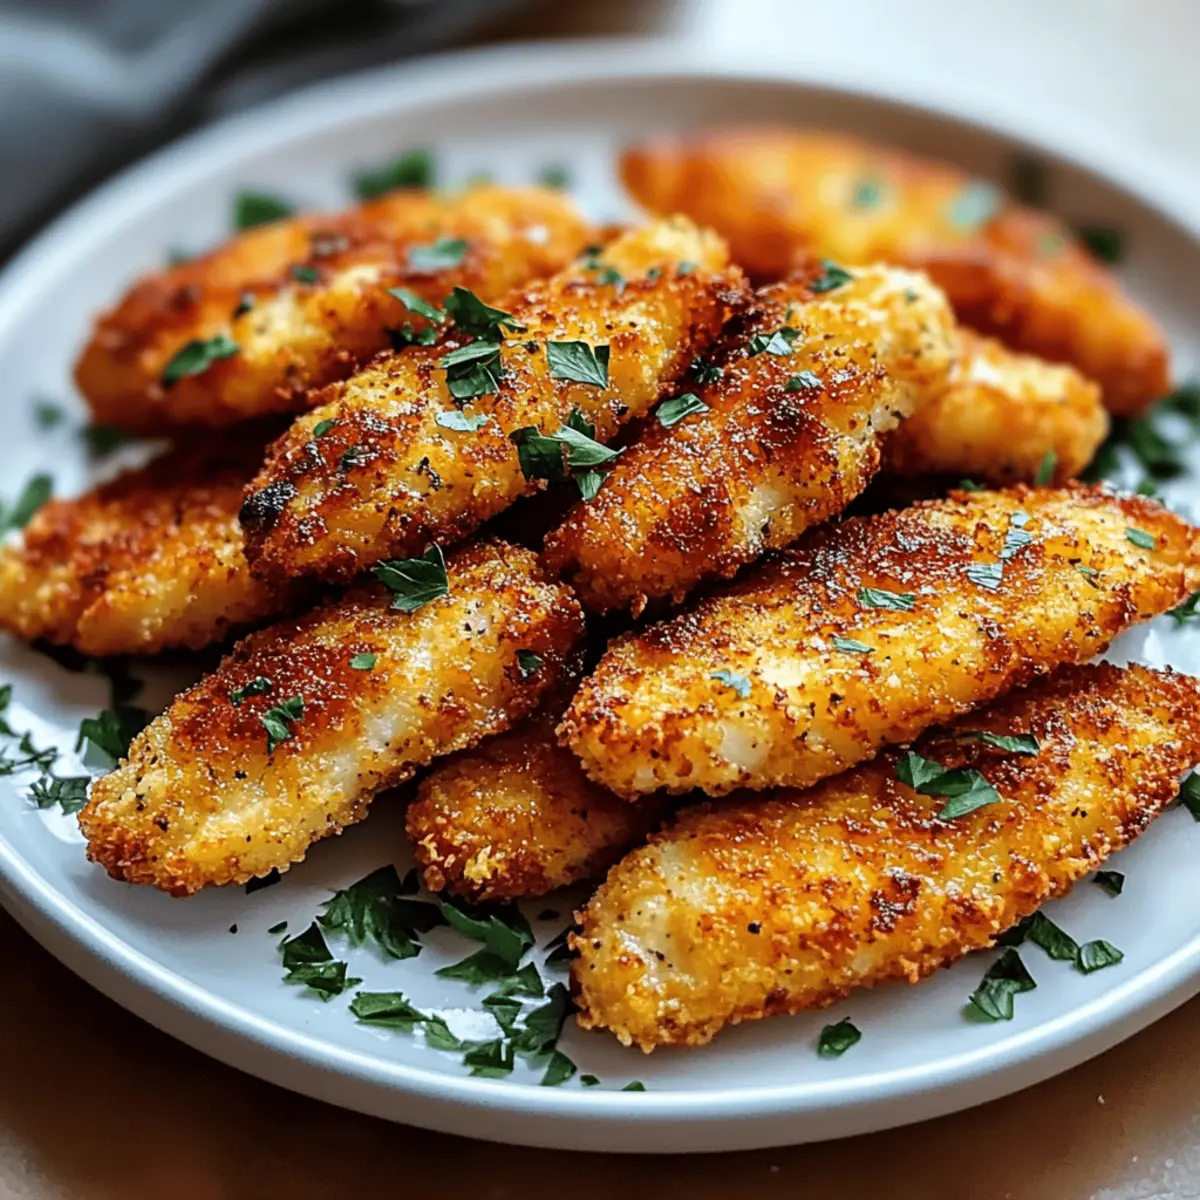
The tantalizing aroma of crispy chicken fills the air, taking me straight back to cozy family dinners that linger in my memory. Today, I’m thrilled to share my recipe for Crispy Baked Chicken Tenders, a healthier twist on a classic favorite. These tenders combine perfectly crunchy panko breadcrumbs with tender, juicy chicken, making them a hit with kids and adults alike. Plus, they’re a breeze to whip up on busy weeknights, ensuring you get a comforting, satisfying meal without the fuss. Not only will this recipe help you dodge the greasy frying pan, but it also allows for endless customization with spices and coatings. Are you ready to transform your dinner table? Let’s dive into this delicious adventure together!

Why Will You Love These Chicken Tenders?
Simplicity and Speed: The process is incredibly straightforward, making it perfect for even the busiest weeknights.
Crunchy Outside, Juicy Inside: Enjoy a delightful contrast of textures with perfectly crispy panko crumbs enveloping tender chicken.
Customization Galore: Tailor the flavor to your liking! Whether you crave spicy, cheesy, or herby, the possibilities are endless.
Healthier Option: With less grease, these tenders offer a guilt-free alternative to traditional frying, ideal for health-conscious eaters.
Family-Friendly Appeal: These delightful tenders are a hit with kids and adults alike, making meal times a joyous occasion.
Plus, don’t forget to check out our tips for make-ahead options to make your meal prep even easier!
Crispy Baked Chicken Tenders Ingredients
For the Chicken
• Chicken Breasts – The main protein choice that delivers a juicy bite. Substitution: For convenience, pre-cut chicken tenders work well too.
For the Coating
• Panko Breadcrumbs – Essential for creating that delightful crispy layer; light and crunchy. Substitution: Choose gluten-free panko for a gluten-free variation.
• Parmesan Cheese – Adds a rich, savory flavor that enhances the coating. Substitution: Grated aged cheddar can be swapped for a sharper taste.
• Eggs – Works as a binder to help the breadcrumbs stick beautifully to the chicken. Note: Be careful to beat the eggs until they’re pale for best adhesion.
For the Seasoning
• Garlic Powder – Infuses the chicken with a robust flavor. Customization: Adjust the amount based on your flavor preference.
• Paprika – Adds a hint of warmth and color to the tenders. Customization: Use smoked paprika for an extra smoky kick.
• Onion Powder – Complements the other flavors and enhances the overall taste.
• Salt & Pepper – The basics that elevate each flavor layer and ensure seasoning throughout.
Step‑by‑Step Instructions for Crispy Baked Chicken Tenders
Step 1: Prep Chicken
Begin by slicing the chicken breasts into 1-inch-wide strips to form your tenders. Season the strips generously with salt and pepper, ensuring each piece is evenly coated. This initial step is vital for infusing flavor deep into your Crispy Baked Chicken Tenders, so set them aside while you prepare the breading stations.
Step 2: Set Up Breading Stations
Prepare your breading area by placing one bowl with beaten eggs and a second bowl filled with a delightful mixture of panko breadcrumbs, grated Parmesan cheese, garlic powder, paprika, onion powder, salt, and pepper. Having these stations ready will streamline the breading process, making it quick and efficient, and ensuring that your tenders come out perfectly coated.
Step 3: Bread Chicken
Take each chicken strip and dip it into the beaten eggs, allowing any excess to drip off. Next, coat the strip in the breadcrumb mixture, pressing down gently to help the crumbs adhere. For an extra crunchy texture, repeat the dipping and coating process for a second layer. This step is key to achieving the signature crispness of your Crispy Baked Chicken Tenders.
Step 4: Prepare Baking Sheet
Line a baking sheet with parchment paper or a silicone mat to prevent sticking. If you have a wire rack, place it on top of the baking sheet, as this will allow heat to circulate around the tenders, enhancing their crispness. Arrange the breaded chicken tenders on the rack, ensuring they have space between them, and lightly spray with olive oil.
Step 5: Bake
Preheat your oven to 400°F (200°C) while the tenders rest. Once heated, bake the chicken tenders for 20 to 25 minutes, flipping them halfway through so they cook evenly. Look for a golden-brown exterior and use a meat thermometer to check that they reach an internal temperature of 165°F (74°C), ensuring they are safely cooked.
Step 6: Cool and Serve
After baking, let the crispy tenders cool for a few minutes on the rack. This resting time allows the juices to redistribute, maintaining juiciness. Serve your Crispy Baked Chicken Tenders alongside dipping sauces like honey mustard, ranch, or BBQ for a delightful meal that’s sure to please everyone at the table.
How to Store and Freeze Crispy Baked Chicken Tenders
Fridge: Store leftover crispy baked chicken tenders in an airtight container for up to 3 days. This will keep them fresh and ready to enjoy anytime.
Freezer: For longer storage, freeze the tenders on a baking sheet for 2 hours before transferring to a freezer bag. They can be kept frozen for up to 3 months.
Reheating: To maintain their crispy texture, reheat baked chicken tenders in a preheated oven at 375°F (190°C) for about 10 minutes. This method revives that delightful crunch!
Thawing: If frozen, thaw them overnight in the fridge before reheating to ensure even warming and preserve the quality of your crispy baked chicken tenders.
Expert Tips for Crispy Baked Chicken Tenders
-
Wire Rack Use: Elevate your tenders on a wire rack during baking. This allows hot air to circulate around, preventing steaming and ensuring every bite is perfectly crispy.
-
Double Coating: For extra crunchiness, dip the chicken strips in the egg and breadcrumb mixture twice. This creates a thicker layer, enhancing the crisp texture of your Crispy Baked Chicken Tenders.
-
Season Early: Don’t skip the seasoning! Salt and pepper should be generously applied before breading to deeply flavor the chicken. This step is crucial for a tasty bite.
-
Baking Sheet Prep: Use parchment paper or a silicone mat to prevent sticking. If you don’t have a wire rack, just ensure the tenders are spaced out on the baking sheet.
-
Cooling Time: Allow the tenders to rest for a few minutes after baking. This preserves their juiciness and ensures that you enjoy every delightful moment of flavor.
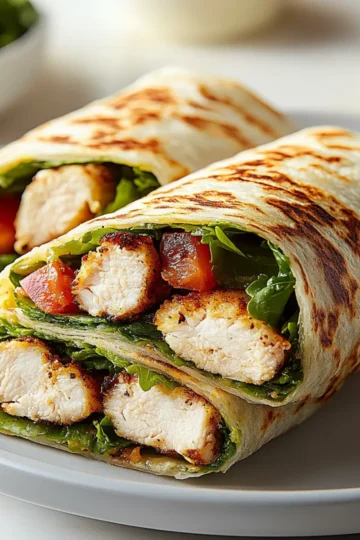
What to Serve with Crispy Baked Chicken Tenders
Transform your dinner into a satisfying feast with these delightful sides that elevate your crispy chicken experience.
- Creamy Mashed Potatoes: Each velvety bite complements the crunchy tenders, creating a comforting contrast that's hard to resist.
- Crisp Garden Salad: A refreshing medley of greens and veggies adds brightness and texture, balancing the richness of the chicken.
- Garlic Roasted Broccoli: The subtle char and garlicky aroma enhance the meal, making it nutritious and bursting with flavor.
- Sweet Potato Fries: These naturally sweet and crispy fries offer a fun twist, perfect for dipping alongside your tenders.
- Honey Mustard Dipping Sauce: This sweet and tangy dip brings a burst of flavor, harmonizing beautifully with the savory chicken tenders.
- Savory Rice Pilaf: Fluffy rice with herbs and spices provides a fragrant, hearty side that pairs well with the tenders’ crispy texture.
- Classic Coleslaw: Crunchy and creamy coleslaw adds a delightful crunch, balancing the meal with its tangy flavor profile.
- Sparkling Lemonade: A refreshing beverage with a hint of citrus cleanses the palate and adds a celebratory touch to the meal.
- Chocolate Chip Cookies: End on a sweet note with warm, gooey cookies – a heartwarming dessert to delight the whole family.
Make Ahead Options
These Crispy Baked Chicken Tenders are ideal for meal prep enthusiasts looking to save time during busy weeknights! You can bread the chicken strips up to 24 hours in advance; simply follow the usual breading steps and store the coated tenders in a single layer on a baking sheet covered with plastic wrap in the fridge. This helps maintain their crispiness. When you’re ready to bake, just pop them into a preheated oven at 400°F (200°C) and cook for 20-25 minutes until golden brown and cooked through. For longer storage, freeze the breaded tenders for up to 3 months—they'll be just as delicious when baked straight from the freezer!
Crispy Baked Chicken Tenders Variations
Feel free to get creative with your chicken tenders! With endless possibilities, you can explore flavors that tantalize your taste buds.
- Gluten-Free: Substitute panko with gluten-free breadcrumbs or crushed almond flour for a delicate crunch.
- Cheesy Delight: Add a sprinkle of shredded mozzarella or cheddar to the breadcrumb mix for a gooey twist.
- Spicy Kick: Toss in cayenne pepper or chili flakes to the seasoning for an exciting heat level.
- Herb-Infused: Incorporate fresh herbs like rosemary or thyme into the breadcrumbs for an aromatic lift.
- Nut-Crunch Coating: Use crushed nuts like pistachios or walnuts instead of breadcrumbs for an unexpected, crunchy texture.
- BBQ-Style: Brush the tenders with your favorite BBQ sauce during the last few minutes of baking for a sticky, flavorful finish.
- Asian Inspiration: Add sesame seeds and a dash of soy sauce to the breadcrumb mix for a delightful twist to your tenders.
- Citrus Zest: Sprinkle grated lemon or lime zest into the egg mixture for a refreshing citrus note that brightens every bite.
With these variations, your Crispy Baked Chicken Tenders will never be the same twice! Have fun experimenting and find your new favorite flavor combination which can turn any meal into a celebration. And don’t forget, these delightful bites pair wonderfully with a simple salad or roasted veggies for a balanced dinner.
Crispy Baked Chicken Tenders Recipe FAQs
How do I select the best chicken breasts for this recipe?
Absolutely! When choosing chicken breasts, look for those that are firm and have a pinkish hue without any dark spots. Fresh chicken will have a very light smell. If you can, opt for organic, free-range chicken for the best flavor and quality.
How should I store leftover chicken tenders?
To keep your crispy baked chicken tenders fresh, store them in an airtight container in the fridge for up to 3 days. Make sure they are completely cooled before sealing to avoid moisture buildup.
Can I freeze crispy baked chicken tenders?
Certainly! To freeze your tenders, arrange them on a baking sheet in a single layer and freeze for about 2 hours until solid. Then, transfer them to a freezer bag, squeezing out as much air as possible before sealing. They can stay fresh for up to 3 months.
What’s the best way to reheat chicken tenders while keeping them crispy?
To reheat and retain that delightful crunch, place the tenders in a preheated oven at 375°F (190°C) for about 10 minutes. This method prevents sogginess, unlike microwaving, which can ruin the crispy coating.
Are there any dietary considerations for crispy baked chicken tenders?
Yes! If you or someone you’re serving has gluten sensitivities, you can use gluten-free panko breadcrumbs. Also, always ensure that the spices used are free from allergens like nuts to accommodate those with allergies. For pet safety, keep these chicken tenders away from pets, particularly if they contain garlic and onion powder, as they can be toxic to them.
What do I do if my chicken tenders aren't crispy after baking?
If your chicken tenders don’t come out as crispy as expected, ensure that they were evenly spaced on the baking sheet. It’s also important to use a wire rack for air circulation while baking. If you skipped this step, try again with this method! Additionally, consider double-coating them for added crunch next time.
Crispy Baked Chicken Tenders That Are Juicy and Guilt-Free
Ingredients
Equipment
Method
- Begin by slicing the chicken breasts into 1-inch-wide strips to form your tenders. Season the strips generously with salt and pepper.
- Prepare your breading area by placing a bowl with beaten eggs and a second bowl with a mixture of panko breadcrumbs, grated Parmesan cheese, garlic powder, paprika, onion powder, salt, and pepper.
- Dip each chicken strip into the beaten eggs, letting excess drip off, then coat with the breadcrumb mixture, pressing down gently. Repeat for extra crunch.
- Line a baking sheet with parchment paper or a silicone mat. If using, place a wire rack on top of the baking sheet and arrange the breaded chicken tenders on the rack.
- Preheat your oven to 400°F (200°C). Bake for 20 to 25 minutes, flipping halfway through, until golden-brown and cooked to an internal temperature of 165°F (74°C).
- Let the crispy tenders cool for a few minutes on the rack before serving with dipping sauces.


Leave a Reply