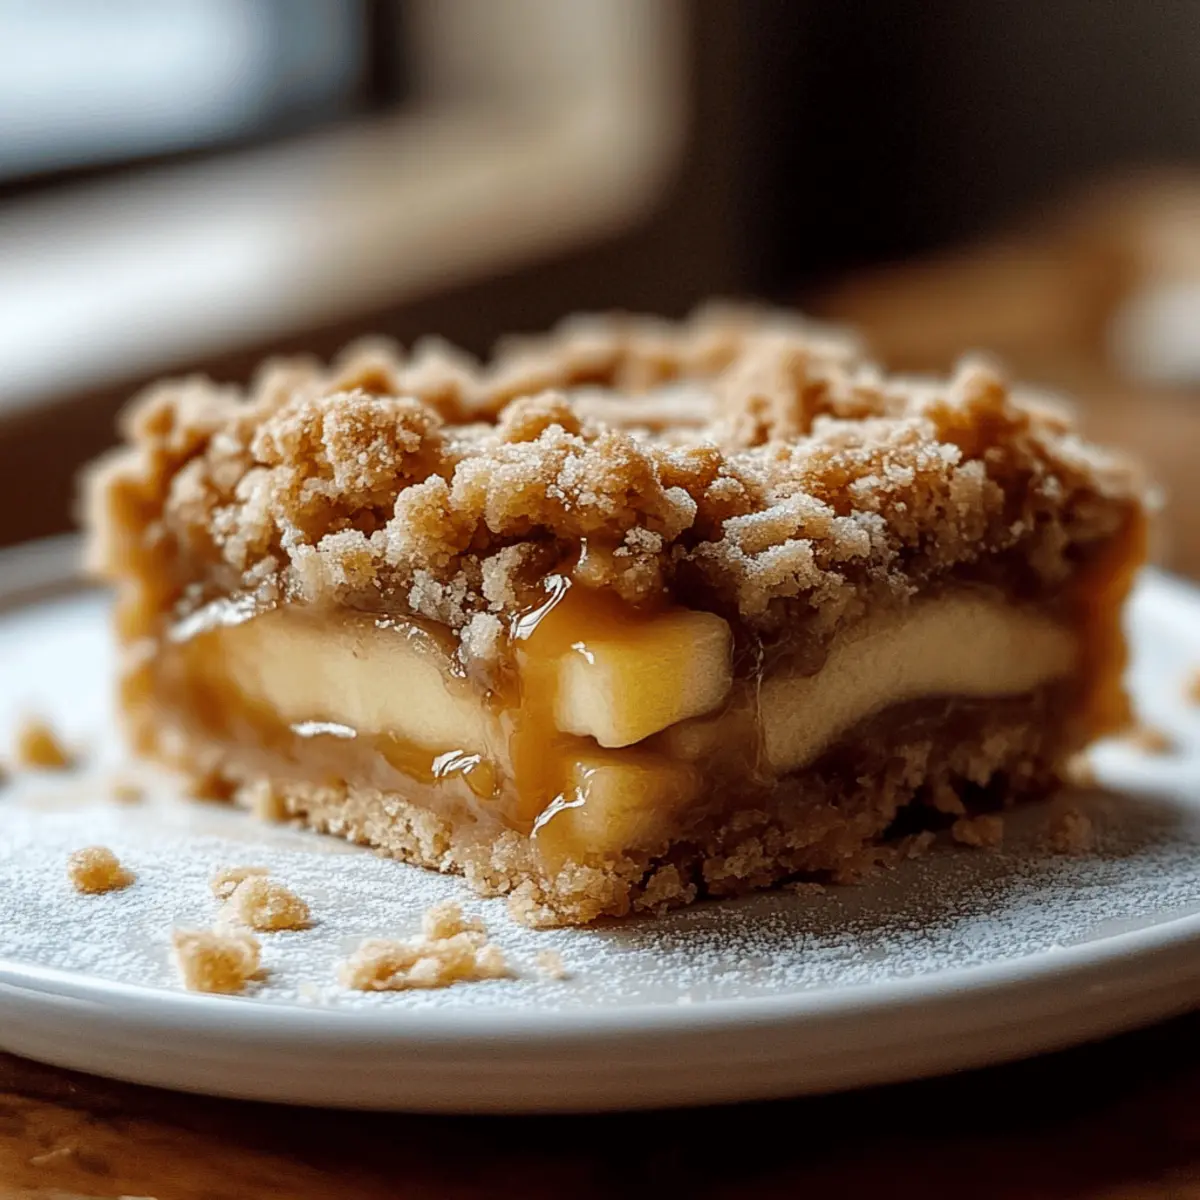
A whiff of cinnamon-spiced apples brings me right back to those crisp autumn days, when the air is filled with laughter and the promise of cozy gatherings. It’s the perfect time to whip up a delightful batch of Salted Caramel Apple Crumble Bars, a dessert that effortlessly combines homey warmth with that irresistible sweet-and-salty twist. In just 45 minutes, this recipe delivers comfort that feels both nostalgic and fresh, making it a fabulous option for any occasion. Plus, it’s super easy to prepare and customizable with your favorite apple varieties! Who knew homemade could be so simple yet so satisfying? Are you ready to dive into a crumbly, caramel-drizzled slice of fall bliss?

Why are these bars a must-try?
Irresistible Flavor: The blend of cinnamon-spiced apples and salted caramel creates a unique balance that keeps you coming back for more.
Quick to Make: In just 45 minutes, you can bring these comforting bars to life, elevating your baking game without hours in the kitchen.
Customizable Delight: Swap in your favorite apple varieties like Fuji or Braeburn to tailor flavors to your taste.
Crowd-Pleasing Treat: Whether it’s a family gathering or a cozy night in, these bars are sure to impress everyone.
Perfectly Textured: Experience that satisfying crunch on top with a warm, gooey apple layer beneath—pure dessert perfection!
For a different take, you might also enjoy my Apple Butter Pie or try a variation with homemade caramel for an extra personal touch.
Salted Caramel Apple Crumble Bars Ingredients
For the Crust and Topping
- Butter – provides richness and moisture; use unsalted butter for better control of saltiness.
- Granulated Sugar – sweetens the crust and filling; can be substituted with brown sugar for a deeper flavor.
- Vanilla Extract – adds warmth and complexity; use pure vanilla extract for the best flavor.
- All-Purpose Flour – forms the base for the crust and crumble topping; can replace with gluten-free flour for a gluten-free version.
For the Apple Filling
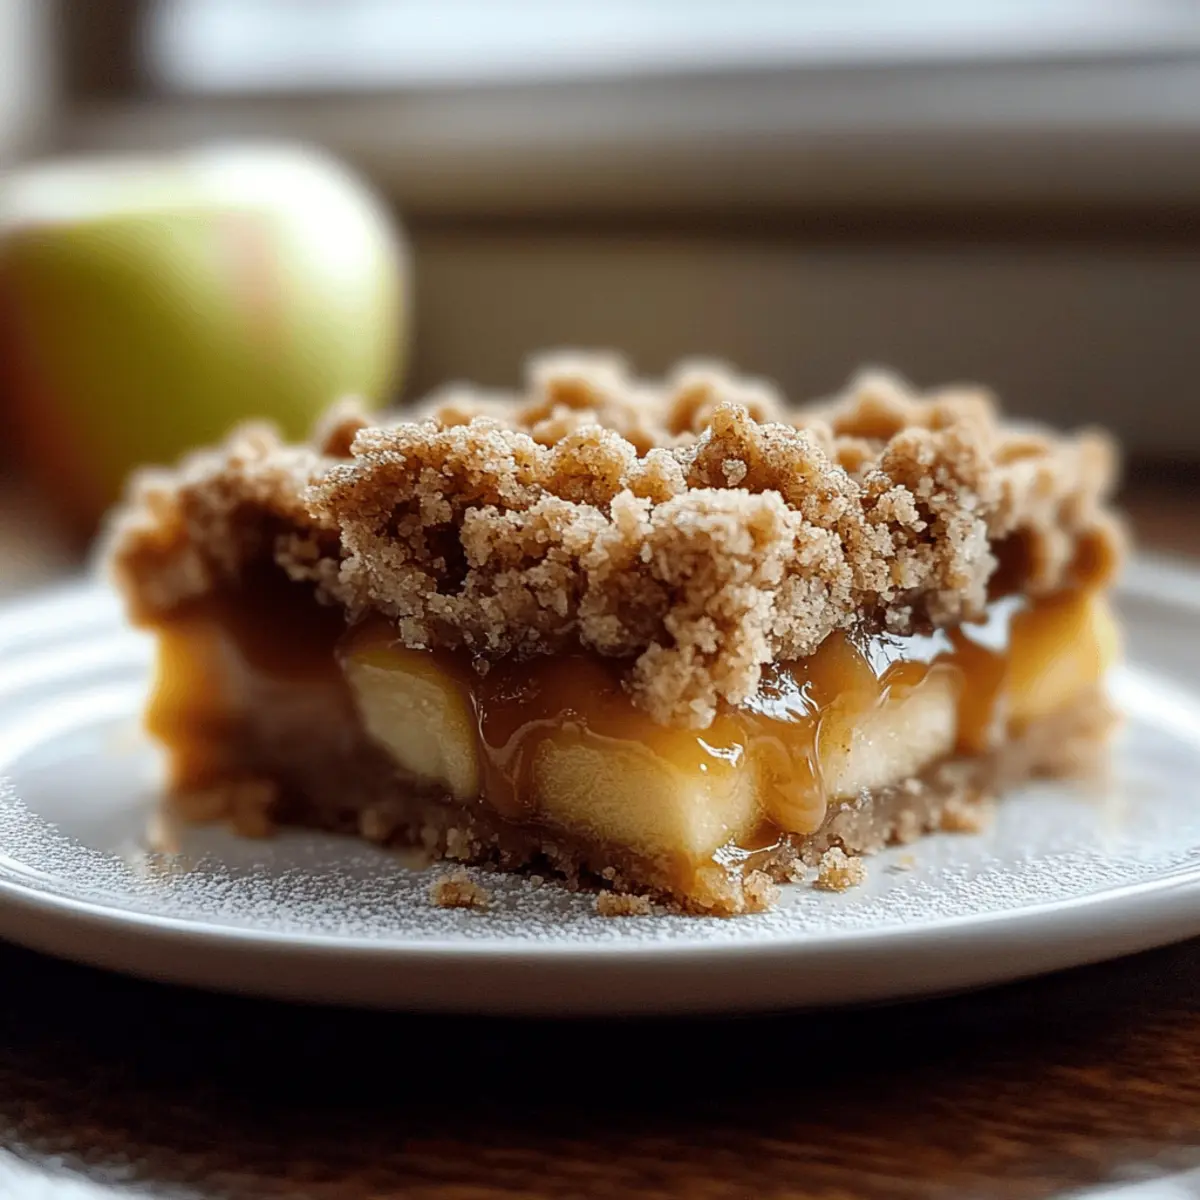
- Apples (Honeycrisp, Granny Smith) – offers a balance of sweetness and tartness; mixing different varieties enhances depth of flavor.
- Ground Cinnamon – adds spice and aroma; nutmeg can be included for added warmth.
For the Salted Caramel
- Salted Caramel Sauce – provides a sweet and salty flavor contrast; store-bought works fine or homemade for personalization.
- Flaky Sea Salt – enhances the caramel flavor when sprinkled on top; optional, but it enhances the overall experience.
Dive into making these Salted Caramel Apple Crumble Bars and savor the delightful explosion of flavors!
Step‑by‑Step Instructions for Salted Caramel Apple Crumble Bars
Step 1: Prep the Oven & Pan
Preheat your oven to 375°F (190°C) to create the perfect baking environment for your Salted Caramel Apple Crumble Bars. While the oven warms up, line a 9x13 inch baking pan with parchment paper, allowing some overhang for easy removal later. This will ensure your bars come out beautifully.
Step 2: Make Crust Mixture
In a medium bowl, whisk together melted unsalted butter, granulated sugar, vanilla extract, and a pinch of salt until well combined. Gradually mix in all-purpose flour until the mixture turns crumbly. Reserve two-thirds of this mixture for the base, ensuring it maintains its texture—a perfect foundation for the caramel apple layers to come.
Step 3: Prepare Apple Filling
Thinly slice your choice of apples, such as Honeycrisp or Granny Smith, and place them in a large mixing bowl. Toss the apple slices with ground cinnamon (and nutmeg, if desired) until each slice is evenly coated. This fragrant mixture will transform into a warm and spiced apple filling that complements the crumble perfectly.
Step 4: Layer Bars
Press the reserved crust mixture firmly into the bottom of the prepared baking pan, forming an even layer. Next, spread the spiced apple mixture over the crust, ensuring it covers every corner. Drizzle a generous amount of salted caramel sauce over the apples, allowing it to seep in. Finally, sprinkle the remaining crumble mixture on top for that delightful added crunch.
Step 5: Bake
Place the pan in your preheated oven and bake for 40-45 minutes. Watch closely as the topping turns golden brown and the apple filling becomes tender. The aroma of cinnamon and caramel will fill your kitchen, indicating these Salted Caramel Apple Crumble Bars are almost ready to delight your taste buds.
Step 6: Cool & Serve
Once baked, remove the pan from the oven and let the bars cool completely in the pan on a wire rack. This cooling time is essential to ensure your bars hold their shape when cut. After about 30 minutes, slice into squares and serve. For an extra treat, pair them with a scoop of vanilla ice cream or a dollop of whipped cream.
What to Serve with Salted Caramel Apple Crumble Bars
Indulge in building a cozy meal with delightful pairings that enhance the warmth and sweetness of your bars.
- Vanilla Ice Cream: A classic choice, the creamy texture beautifully contrasts the warm, spiced apples and crunchy topping.
- Whipped Cream: Light and airy, a dollop of whipped cream adds an extra layer of sweetness, elevating each bite.
- Chai Tea: The aromatic spices in chai complement the cinnamon in the bars, creating a harmonious flavor experience.
- Coffee: A rich cup of coffee cuts through the sweetness, balancing the flavors perfectly while offering cozy warmth.
- Fresh Fruit Salad: A refreshing mix of seasonal fruits brings brightness to the meal, enhancing the autumn vibe.
- Caramel Drizzle: Elevate your serving by drizzling extra salted caramel on top, intensifying the decadent experience.
These pairings not only enhance the flavors of your Salted Caramel Apple Crumble Bars but also create a wonderful atmosphere for sharing with loved ones.
Salted Caramel Apple Crumble Bars Variations
Feel free to get creative and make these delightful bars your own with these fun twists and substitutes!
-
Different Apples: Experiment with various apple types, like Fuji or Braeburn, for exciting flavor profiles. Each variety brings its own sweetness and tartness.
-
Gluten-Free Option: Swap in gluten-free flour instead of all-purpose flour for a gluten-free treat that everyone can enjoy. Your friends and family won't even notice the difference!
-
Nutty Surprise: Add chopped pecans or walnuts to the crumble mixture. These nuts add a delightful crunch that pairs beautifully with the apples and caramel.
-
Less Sugar: Use coconut sugar or a sugar substitute to lower the sweetness without compromising flavor. This can also provide a caramel-like richness.
-
Homemade Caramel: If you're feeling adventurous, make your own salted caramel sauce for a personalized touch. The rich, buttery flavor will elevate this dessert even further.
-
Spicy Kick: Incorporate ground ginger or cloves into your apple mixture for an extra layer of warmth and spice. This will add a delightful twist that can remind you of the holidays!
-
Caramel Bottom Layer: Spread a layer of caramel sauce on the bottom before adding the crumbly crust. This creates a delicious gooey layer that everyone will love.
For added inspiration, you might also enjoy my take on Apple Butter Pie which offers a different yet delicious apple experience!
Storage Tips for Salted Caramel Apple Crumble Bars
Room Temperature: Store leftover bars in an airtight container at room temperature for up to 2 days to maintain their crunchy topping and delicious flavor.
Fridge: For extended freshness, refrigerate the bars in an airtight container for up to 1 week. Just be aware that they may soften slightly.
Freezer: If you want to enjoy your Salted Caramel Apple Crumble Bars later, wrap individual squares in plastic wrap, place them in a freezer-safe bag, and freeze for up to 2 months.
Reheating: To reheat, remove bars from the refrigerator or freezer, and warm them in the oven at 350°F (175°C) for 10-15 minutes to restore that fresh-baked texture.
Make Ahead Options
These Salted Caramel Apple Crumble Bars are perfect for meal prep enthusiasts! You can prepare the crust and apple filling up to 24 hours in advance, simply refrigerating them separately. First, make the crust mixture and press it into the lined baking pan, then store it in the fridge. Next, slice your apples, toss them with cinnamon and nutmeg, and keep them in an airtight container. When you’re ready to bake, layer the chilled apples over the crust, drizzle with salted caramel, and sprinkle the crumble topping before baking. This way, you’ll enjoy delicious homemade bars with minimal effort, allowing you to focus on what really matters—time with family and friends!
Helpful Tricks for Salted Caramel Apple Crumble Bars
- Cool Completely: Allow the bars to cool completely in the pan before slicing; this helps them hold their shape and prevents a mushy mess.
- Parchment Benefits: Use parchment paper with overhang to make removing the bars from the pan easier and to help maintain their edges.
- Perfect Slices: For cleaner cuts, dip your knife in hot water before slicing, wiping it dry between cuts for a neat presentation.
- Reheat Wisely: If reheating, warm the bars in the oven rather than the microwave, which keeps the texture crunchy yet gooey with the caramel.
- Custom Caramel: Consider making your own salted caramel for a richer taste, adjusting the salt to your preference for these Salted Caramel Apple Crumble Bars.
Salted Caramel Apple Crumble Bars Recipe FAQs
What type of apples are best for Salted Caramel Apple Crumble Bars?
Absolutely! Using a mix of apples such as Honeycrisp and Granny Smith creates a beautiful balance of sweet and tart flavors. Honeycrisp adds juiciness while Granny Smith contributes that pleasant tartness, which perfectly complements the sweetness of the salted caramel.
How should I store my Salted Caramel Apple Crumble Bars?
For optimal freshness, store your leftover bars in an airtight container at room temperature for 1-2 days. If you want them to last longer, refrigerate them for up to 1 week, but keep in mind they may become slightly softer.
Can I freeze Salted Caramel Apple Crumble Bars?
Very! To freeze, wrap individual squares tightly in plastic wrap, then place them in a freezer-safe bag or container. They can be stored in the freezer for up to 2 months. When you're ready to enjoy, simply thaw them in the fridge overnight and reheat in the oven at 350°F (175°C) for about 10-15 minutes.
What should I do if my bars crumble when I slice them?
No worries, this can happen sometimes! Be sure to let the bars cool completely in the pan before cutting them. If they continue to crumble, try using a hot knife by dipping it in hot water and wiping it dry between slices to achieve cleaner cuts.
Can my dog eat the apples used in the bars?
Definitely! Apples are safe for dogs in moderation, but make sure to remove any seeds and core before offering them to your furry friend. The flavors of cinnamon and caramel are not suitable for dogs, so it’s best to keep those bars for human enjoyment only!
Can I substitute any ingredients for dietary restrictions?
Absolutely! If you're looking for gluten-free options, you can replace all-purpose flour with gluten-free flour. For a deeper flavor, feel free to swap granulated sugar for brown sugar. If dairy is a concern, use lactose-free butter in the crust, and you can still enjoy the deliciousness of these Salted Caramel Apple Crumble Bars!

Irresistibly Indulgent Salted Caramel Apple Crumble Bars
Ingredients
Equipment
Method
- Preheat your oven to 375°F (190°C) and line a 9x13 inch baking pan with parchment paper.
- In a medium bowl, whisk together melted butter, granulated sugar, vanilla extract, and a pinch of salt. Gradually mix in all-purpose flour until crumbly, reserving two-thirds for the base.
- Thinly slice the apples and toss with ground cinnamon (and nutmeg, if desired) in a large mixing bowl.
- Press the reserved crust mixture into the bottom of the prepared pan. Spread the spiced apple mixture over it, drizzle with salted caramel sauce, and sprinkle the remaining crumble on top.
- Bake for 40-45 minutes or until the topping is golden brown and apples are tender.
- Let the bars cool completely in the pan on a wire rack before slicing into squares.


Leave a Reply