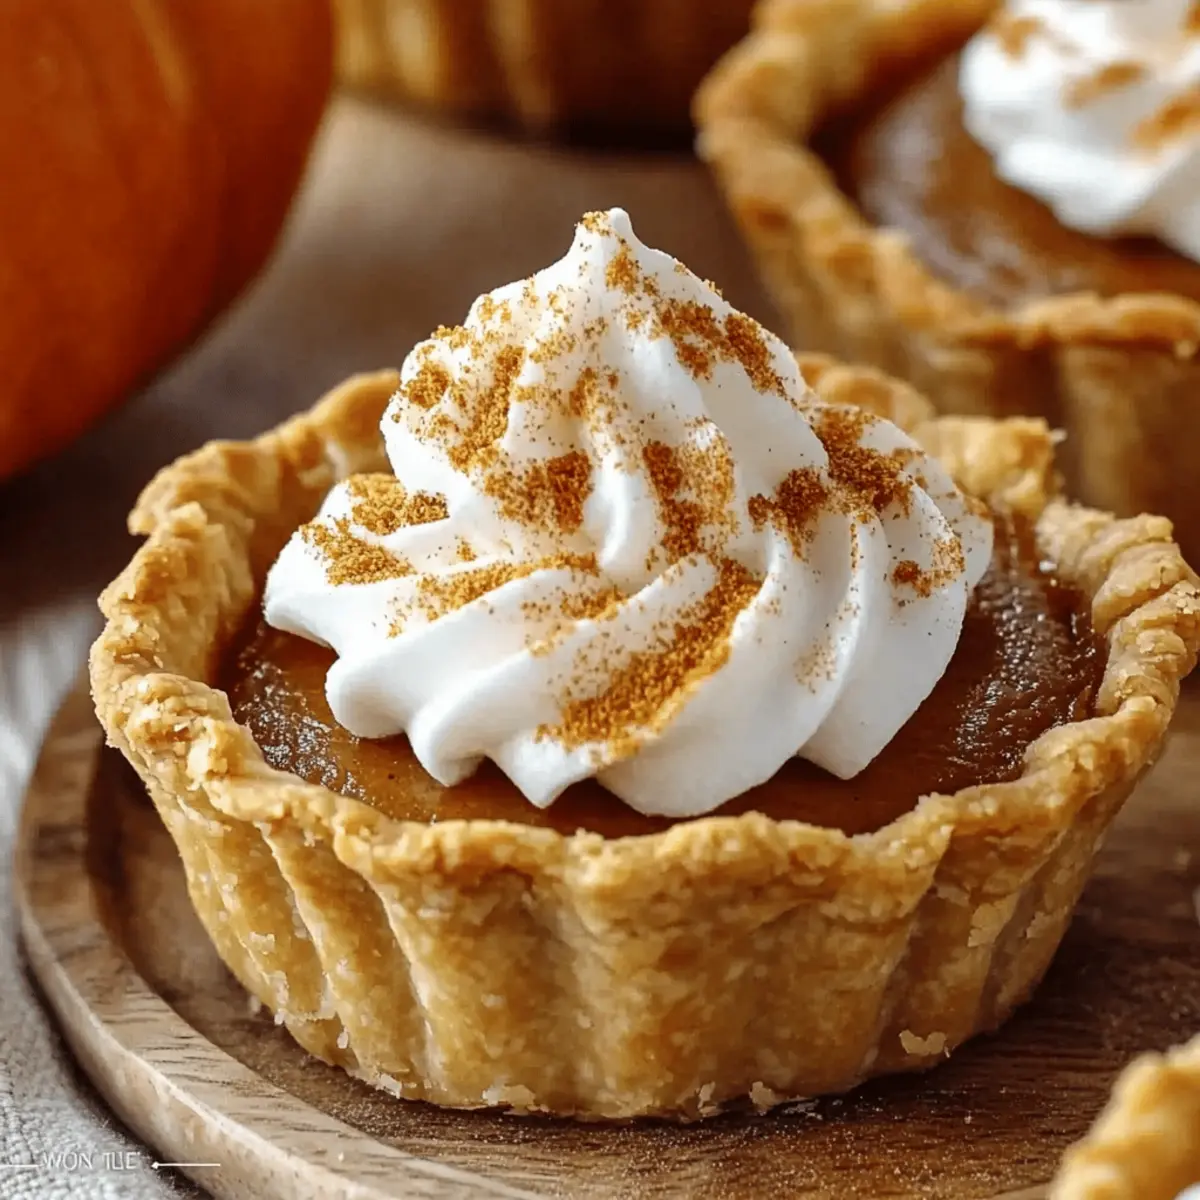
As I sifted through my collection of autumn recipes, this thought struck me: nothing quite encapsulates the essence of fall like Mini Pumpkin Pies. With their golden, flaky crust and smooth, spiced filling, they remind me of crisp mornings and cozy evenings spent huddled around the dinner table. These delightful treats are not only an effortless crowd-pleaser, making them perfect for your next gathering, but they also come together quickly—ideal for those of us juggling a busy schedule. Imagine serving up these adorable mini desserts, each one a little parcel of warmth and nostalgia, that will surely bring smiles to faces young and old. Curious how to create your very own batch? Let’s dive into the recipe!
Why Are Mini Pumpkin Pies So Special?
Unmatched simplicity: These mini pumpkin pies come together with just a few pantry staples, making them a breeze to whip up.
Warm, cozy flavors: Each bite offers a delightful mix of pumpkin and warm spices that capture the essence of fall.
Perfect portioning: Their mini size means everyone can enjoy their own piece, making them ideal for gatherings or holiday celebrations.
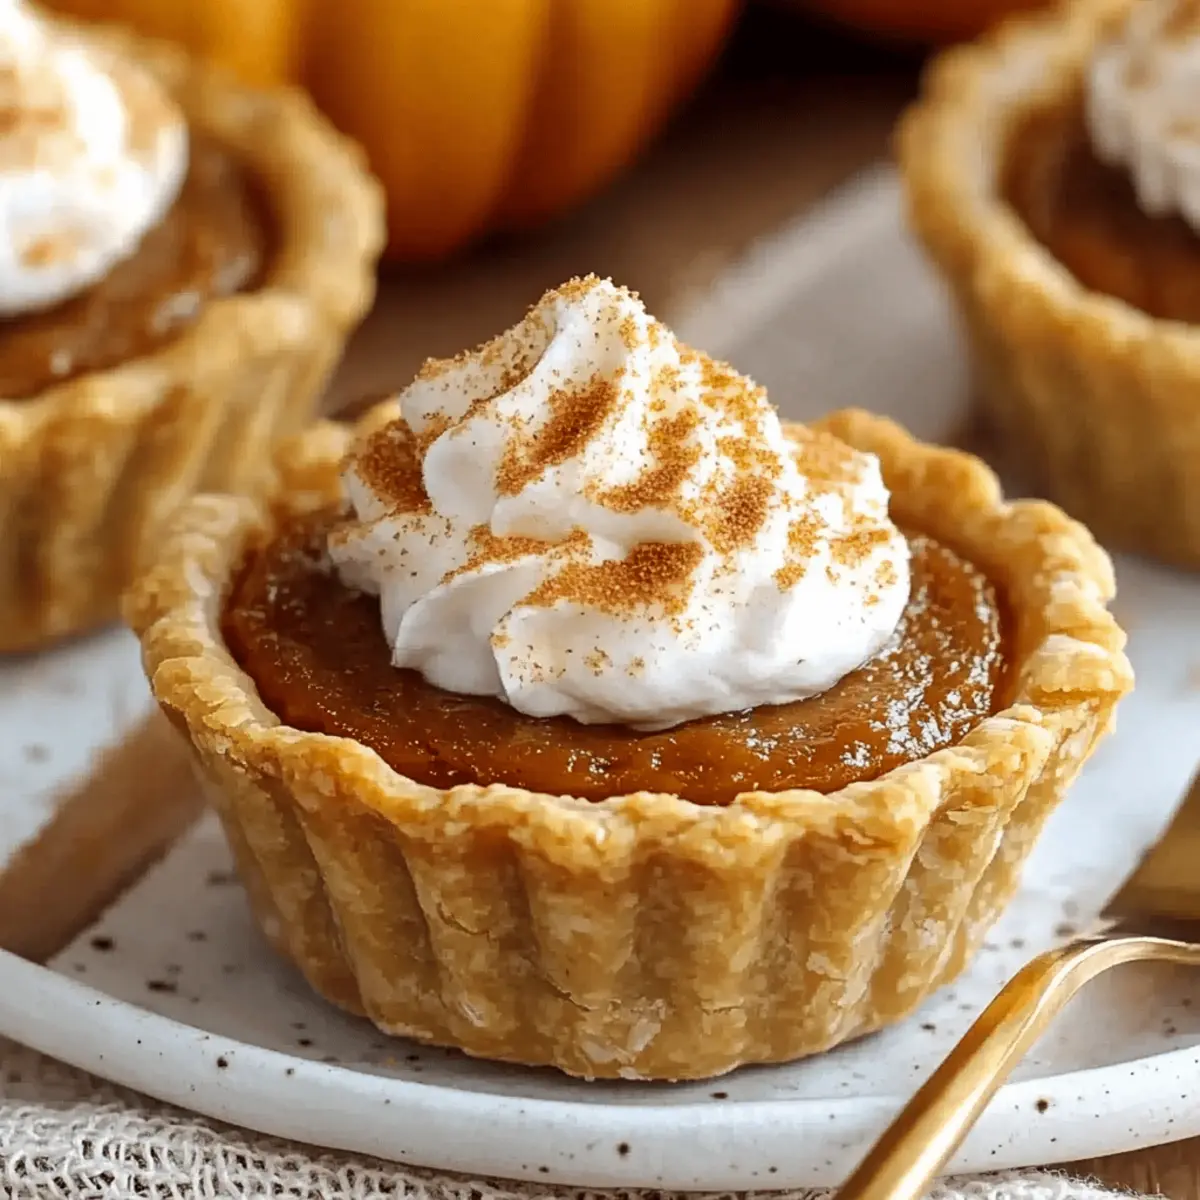
Versatile serving options: Serve them warm with a dollop of whipped cream or chilled for a refreshing twist; they’re delicious either way!
Time-saving treat: With a quick prep time, you can spend less time in the kitchen and more time enjoying the company of loved ones.
Make these mouthwatering mini pumpkin pies your go-to dessert this season, and prepare for compliments from every corner of the table!
Mini Pumpkin Pie Ingredients
• Craving a cozy fall dessert? Here’s what you’ll need to make mini pumpkin pies!
For the Crust
• Pumpkin Pie Crust – Provides structure and texture; prepare with store-bought or homemade options while keeping the dough chilled for maximum flakiness.
For the Filling
• Brown Sugar – Adds rich sweetness and depth; you can substitute with coconut sugar for a delightful twist.
• Granulated Sugar – Offers additional sweetness to balance the flavors.
• Pumpkin Pie Spice – Essential for capturing that warm autumn flavor; in a pinch, blend cinnamon, nutmeg, and ginger instead.
• Salt – Enhances all the other flavors for a balanced taste.
• Pumpkin Puree – Acts as the main flavor component, ensuring a creamy filling; freshly cooked pumpkin gives an even more vibrant taste.
• Evaporated Milk – Contributes to the creaminess of the filling; feel free to swap with regular milk or dairy-free alternatives, but it may change the texture.
• Egg – Acts as a binder, providing a smooth consistency to the filling.
• Vanilla Extract – Enhances the overall flavor profile for perfect balance.
Embrace the fall season with these mini pumpkin pies that promise to cozy up your gatherings!
Step‑by‑Step Instructions for Mini Pumpkin Pies
Step 1: Preheat the Oven
Begin by preheating your oven to 400°F (200°C). This crucial step ensures that your mini pumpkin pies bake evenly and beautifully. While the oven heats up, gather your ingredients and prepare your muffin pans by lightly greasing them to prevent sticking.
Step 2: Prepare the Pie Crusts
Roll out your pie crusts on a lightly floured surface until they reach about ⅛-inch thickness. Using a 3 ½-inch cookie cutter, cut out circles from the dough. Gently press each circle into the muffin pan wells, creating small crusts. Ensure the edges are even for a consistent bake, and then place the pans in the refrigerator to chill briefly.
Step 3: Mix the Sugars and Spices
In a large mixing bowl, combine the brown sugar, granulated sugar, pumpkin pie spice, and salt. Whisk these dry ingredients together thoroughly until well blended. This mixture will add a delightful sweetness and warmth to your mini pumpkin pies, ensuring every bite is packed with fall flavor.
Step 4: Prepare the Pumpkin Filling
Next, add the pumpkin puree, evaporated milk, egg, and vanilla extract to the bowl with your sugar mixture. Whisk everything together until you achieve a smooth, well-combined filling. This creamy mixture is where the magic happens, transforming your mini pumpkin pies into delicious autumn treats.
Step 5: Fill the Crusts
Carefully pour about 2 tablespoons of your prepared pumpkin filling into each chilled crust. Avoid overfilling; the filling should be just shy of the crust’s edge to allow for some expansion during baking. Each mini pumpkin pie will be a delightful small package of flavor once baked.
Step 6: Bake the Mini Pumpkin Pies
Place your muffin pan into the preheated oven and bake for 16-20 minutes. As they bake, keep an eye on them—look for golden-brown crusts and a filling that has a slight jiggle in the center. This visual cue ensures the filling is cooked perfectly while maintaining its creamy texture.
Step 7: Cool and Chill
After baking, remove the mini pumpkin pies from the oven and let them cool in the pan for about 30 minutes. Once cooled, transfer them to a wire rack to cool completely. For best results, refrigerate the mini pumpkin pies for at least 3 hours to allow the filling to set perfectly.
Step 8: Serve and Enjoy
Once chilled, your delicious mini pumpkin pies are ready to be served! Whether enjoyed warm or cold, these treats are delightful on their own or topped with a dollop of whipped cream. Get ready to bask in the praise for your delightful mini pumpkin pies!
Make Ahead Options
These mini pumpkin pies are perfect for meal prep enthusiasts! You can prepare the pie crusts and filling up to 24 hours in advance. To do this, simply roll out the crusts, place them in the muffin pans, and cover with plastic wrap before refrigerating. The filling can also be whisked together and stored in an airtight container for freshness. Just before baking, fill the chilled crusts with the prepared pumpkin mixture and bake as directed for 16-20 minutes. This way, you’ll have delightful treats ready in no time, allowing you to enjoy more moments with loved ones during the busy fall season.
Expert Tips for Mini Pumpkin Pies
Preheat is Key: Always preheat your oven to ensure proper baking and a golden crust. A hot oven makes all the difference!
Watch the Bake Time: Monitor your mini pumpkin pies closely—baking times can vary based on oven type. Look for golden crusts and a slight jiggle in the filling.
Chill for Perfection: Allow your pies to cool completely before refrigerating. This helps the filling set properly for that perfect creamy texture.
Adjusting Sweetness: If you prefer a sweeter filling, feel free to tweak the sugars slightly; just keep in mind that this might alter the final taste.
Garnish Wisely: For an extra festive presentation, top your pies with freshly grated nutmeg or a drizzle of caramel sauce before serving. Enjoy your delightful mini pumpkin pies!
Storage Tips for Mini Pumpkin Pies
Fridge: Store any leftover mini pumpkin pies in an airtight container in the refrigerator for up to 3 days to maintain freshness and flavor.
Freezer: For longer storage, freeze mini pumpkin pies for up to 2 months. Wrap each pie individually in plastic wrap and place in a freezer-safe container.
Thawing: To enjoy frozen mini pumpkin pies, thaw them in the fridge overnight before serving for the best texture and taste.
Reheating: Warm up the pies in a preheated oven at 350°F (175°C) for about 10-15 minutes to restore their flaky crust and creamy filling.
What to Serve with Mini Pumpkin Pies?
As the rich aroma of mini pumpkin pies wafts through your home, you might be wondering what delightful dishes to pair with them for a complete autumn feast.
- Whipped Cream: A classic choice; its silky texture complements the creamy filling, enhancing every bite.
- Spiced Apple Cider: Warm spiced cider evokes feelings of cozy gatherings and pairs beautifully with the pie's flavors.
- Cranberry Sauce: The tartness of cranberries adds a refreshing contrast, elevating the sweet pumpkin notes.
- Cheese Platter: A selection of mild cheeses creates a lovely balance with the sweetness and adds savory richness.
- Roasted Butternut Squash: This dish echoes the fall theme with its sweet, caramelized flavors and vibrant colors.
- Pumpkin Spice Latte: Celebrate the season with this beloved drink, as its coffee undertones and spice resonate perfectly with the pies.
These pairing suggestions will not only enhance your delicious mini pumpkin pies but also create a memorable meal that evokes the essence of fall. Enjoy!
Mini Pumpkin Pies Variations & Substitutions
Feel free to customize these mini pumpkin pies to suit your taste and dietary needs—there's so much you can do!
-
Dairy-Free: Substitute evaporated milk with almond or coconut milk for a lighter, dairy-free version.
-
Gluten-Free: Use a gluten-free pie crust option to accommodate gluten sensitivities and still enjoy the same delightful taste.
-
Add Some Warmth: Incorporate a pinch of cayenne pepper or a dash of chili powder for a subtle kick that beautifully complements the pumpkin sweetness.
-
Chocolate Chip Twist: Fold in a handful of mini chocolate chips into the filling for a decadent twist that will surprise and delight chocolate lovers.
-
Fresh Fruit Infusion: Add a layer of finely chopped pecans or walnuts on the bottom of the crust before pouring in the filling for added crunch and flavor depth.
-
Gourmet Touch: Drizzle with salted caramel sauce after baking to elevate your mini pumpkin pies into an unforgettable dessert experience.
-
Rich and Creamy: Replace the egg with a bit of silken tofu blended until smooth for an extra creamy, egg-free filling.
-
Spice It Up: Swap pumpkin pie spice for a mix of existing spices like cinnamon, ginger, and allspice to create your own signature flavor blend.
Embrace the joy of making these mini pumpkin pies your own, and don’t forget to pair them with a delightful scoop of vanilla ice cream or a dollop of whipped cream for an indulgent finish. Enjoy!

Mini Pumpkin Pies Recipe FAQs
What kind of pumpkin should I use for the filling?
I recommend using 100% pure pumpkin puree for the best flavor. If you prefer a fresher taste, you can also use freshly cooked pumpkin; simply steam or roast your pumpkin until tender, scoop it out, and blend until smooth.
How should I store leftover mini pumpkin pies?
Store any leftover mini pumpkin pies in an airtight container in the refrigerator for up to 3 days. This helps keep them fresh and maintains their delicious flavor, so you can enjoy a sweet bite even after the gathering!
Can I freeze mini pumpkin pies?
Absolutely! To freeze, wrap each cooled mini pumpkin pie individually in plastic wrap and place them in a freezer-safe container. They can be stored for up to 2 months. When you're ready to enjoy them, simply thaw overnight in the refrigerator.
What should I do if my filling seems too runny?
No worries! If your filling looks runny before baking, consider adding a touch more pumpkin puree or an additional egg to help set it. Make sure to mix thoroughly, and this should fix the consistency before you bake.
Are mini pumpkin pies pet-friendly or safe for those with allergies?
No, mini pumpkin pies are not pet-friendly due to the sugars and spices used, especially nutmeg, which can be harmful to pets. If allergies are a concern, substitute the evaporated milk with a suitable dairy-free alternative that your guests can enjoy without worries.
How can I make these mini pumpkin pies dairy-free?
For a dairy-free variation, substitute the evaporated milk with a non-dairy milk like almond or coconut milk. Keep in mind that the texture may be slightly different, so adjusting the ratio of the dry and wet ingredients might be necessary for the best consistency.

Irresistibly Easy Mini Pumpkin Pies to Delight Your Fall
Ingredients
Equipment
Method
- Preheat your oven to 400°F (200°C) and lightly grease your muffin pans.
- Roll out your pie crusts to about ⅛-inch thickness and cut with a cookie cutter to fit your muffin pan.
- In a large bowl, combine brown sugar, granulated sugar, pumpkin pie spice, and salt. Whisk until blended.
- Add pumpkin puree, evaporated milk, egg, and vanilla extract to the dry ingredients and whisk until smooth.
- Pour about 2 tablespoons of filling into each crust, leaving space to expand.
- Bake for 16-20 minutes until crusts are golden-brown and filling jiggles slightly.
- Cool the mini pies in the pan for about 30 minutes before transferring to a wire rack.
- Refrigerate for at least 3 hours before serving for best results.

Leave a Reply