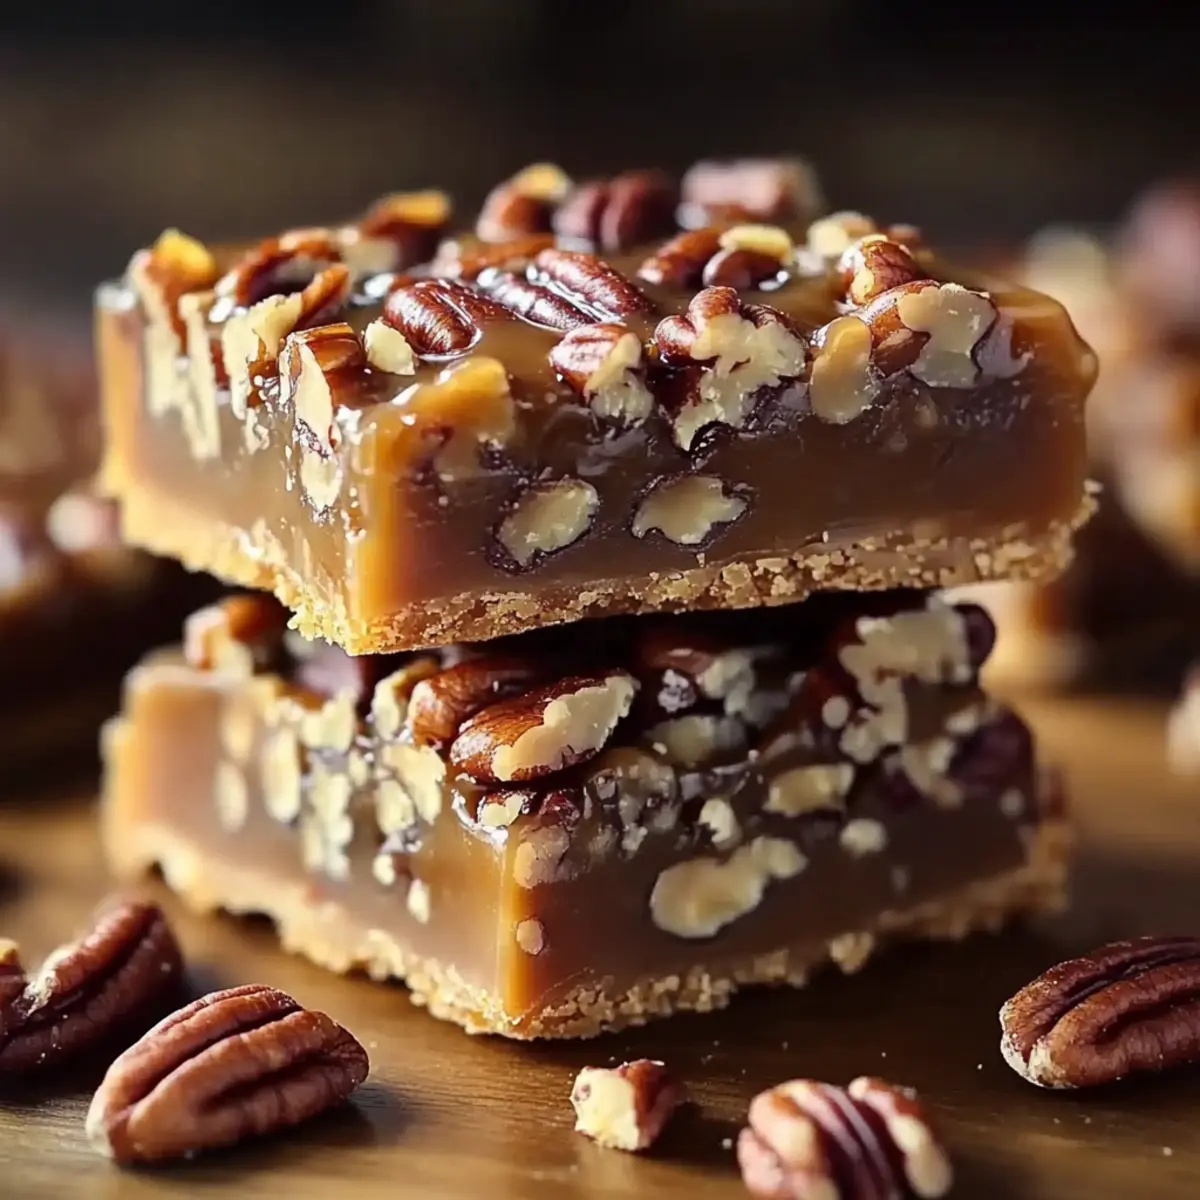
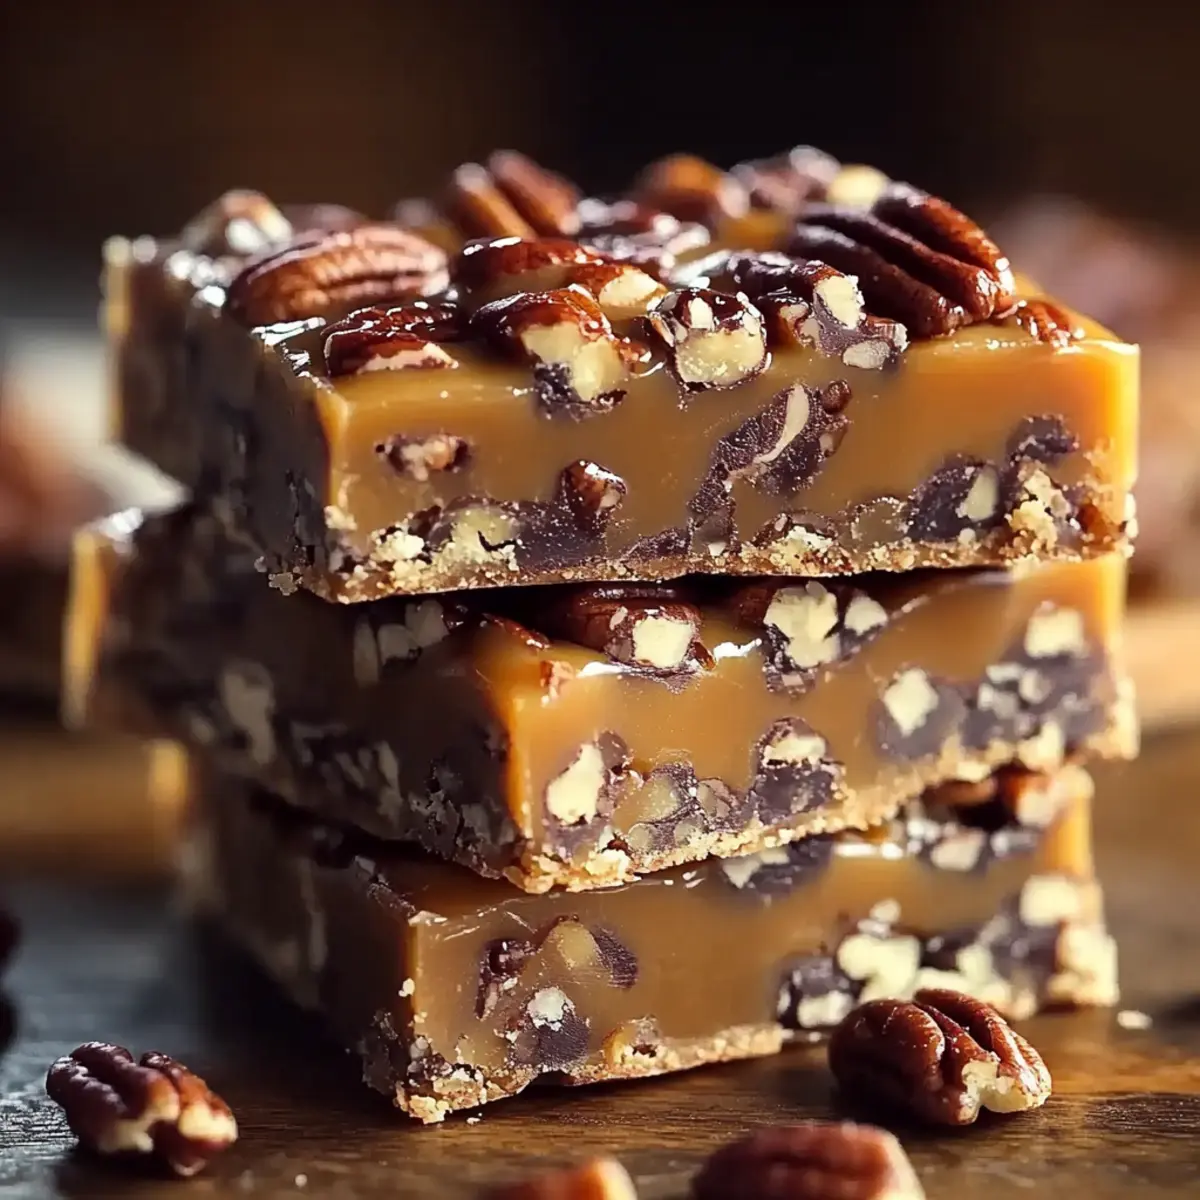
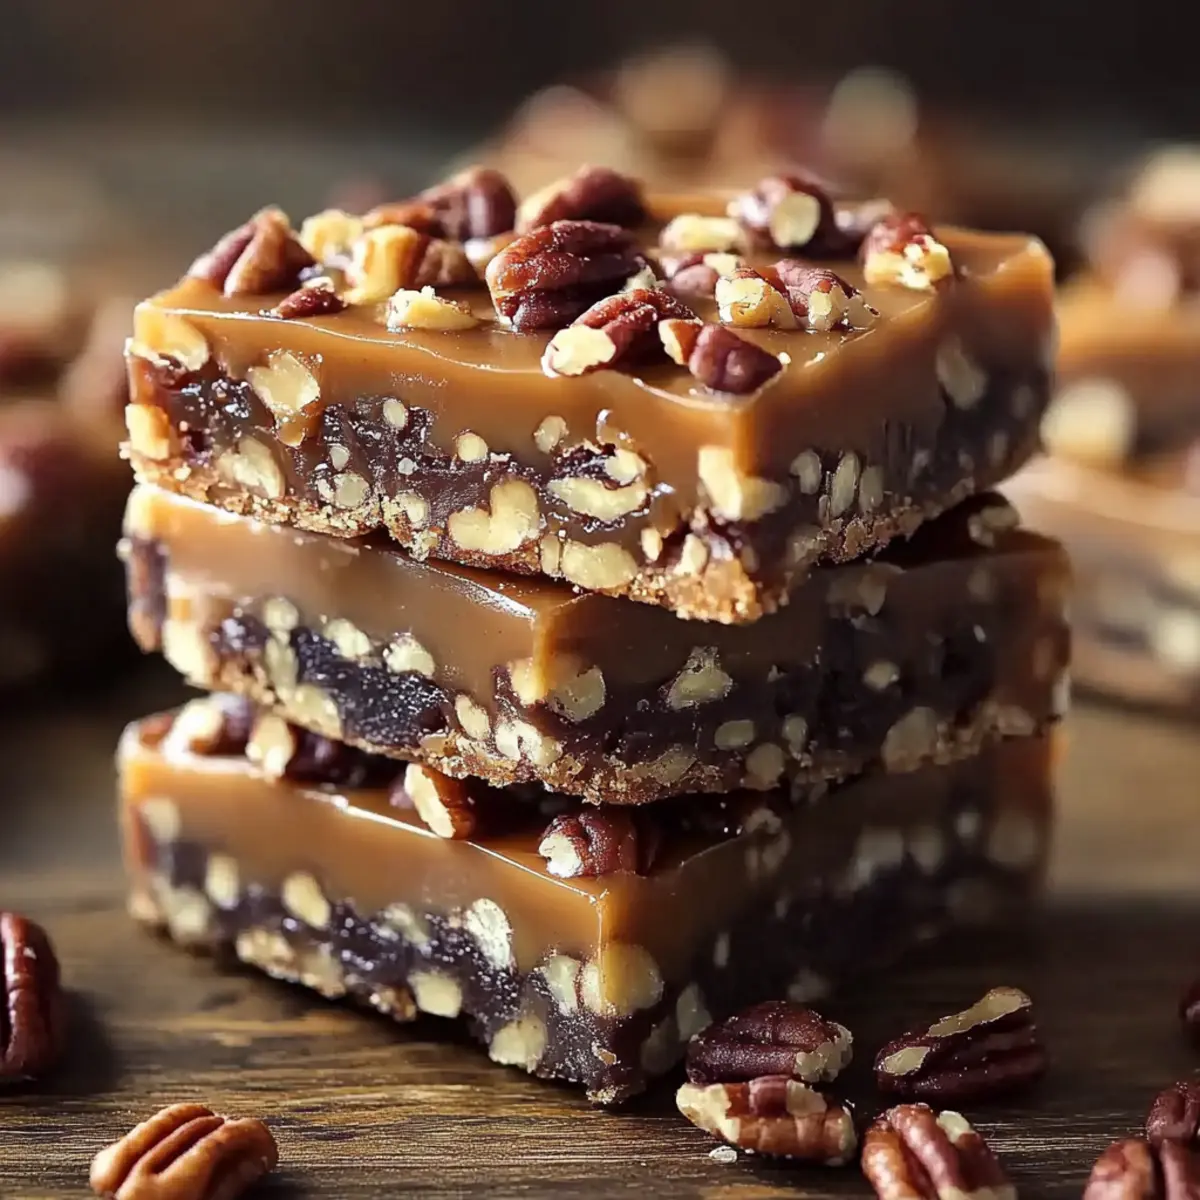
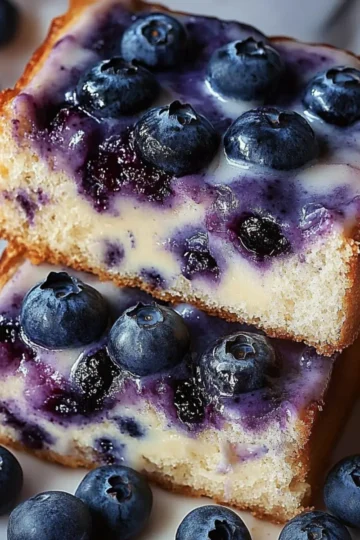
As I whisked my way through the kitchen one rainy afternoon, I stumbled upon a delightful idea that had been sitting in the back of my mind: Turtle Bars with Caramel and Pecans. These bars are the perfect solution for anyone tired of fast food, effortlessly transforming your home into a cozy dessert haven. With their rich, chewy texture and buttery crust, they strike a beautiful balance between crunchy pecans and soft caramel. One of the best parts? They’re incredibly easy to whip up, making them a fantastic option for both novice bakers and seasoned pros alike. Whether you're preparing for a weekend gathering or simply need a sweet treat to brighten your day, these caramel pecan bars will impress and satisfy! What do you think is the secret ingredient that takes them over the top?
What Makes Turtle Bars So Irresistible?
Unforgettable Flavor: The combination of sweet caramel, crunchy pecans, and a buttery crust creates a flavor explosion that will leave your taste buds dancing.
Easy to Make: With minimal ingredients and simple instructions, even beginner bakers can achieve delicious results.
Versatile Treat: Perfect for any occasion, these bars can be served as snacks or desserts, making them a go-to choice for gatherings.
Quick Baking Time: Ready in just 30 minutes, they satisfy your sweet cravings without keeping you in the kitchen all day.
Crowd-Pleasing Appeal: Friends and family will rave about your homemade turtle bars, making you the star of any holiday or bake sale event.
Explore more easy baking ideas like these caramel treats for your next dessert adventure!
Turtle Bars with Caramel and Pecans Ingredients
For the Crust
- Unsalted Butter – Provides richness and structure; ensure it’s at room temperature for easy mixing.
- Brown Sugar – Adds sweetness and a deep flavor; light or dark brown sugar both work well.
- All-Purpose Flour – Gives structure to the bars; sift if desired for a lighter texture.
- Baking Powder – Essential for a gentle rise in the crust.
- Salt – Enhances the flavors, creating a perfect balance with the sweetness.
For the Topping
- Pecans – Adds crunch and a nutty flavor; toast them lightly for an extra depth in taste.
- Caramel Sauce – The star ingredient that provides rich flavors; use store-bought or homemade for convenience, ensuring it's pourable.
- Chocolate Chips (optional) – Perfect for drizzling on top; adds sweetness and visual appeal to your turtle bars.
Enjoy creating these Turtle Bars with Caramel and Pecans that are sure to delight your family and friends!
Step‑by‑Step Instructions for Turtle Bars with Caramel and Pecans
Step 1: Preheat the Oven
Begin by preheating your oven to 350°F (175°C). This crucial step ensures that your Turtle Bars with Caramel and Pecans bake evenly. While the oven heats up, gather your baking pan (preferably an 8x8-inch square one) and grease it lightly with butter or non-stick spray for easy removal later.
Step 2: Cream the Butter and Sugar
In a large mixing bowl, add the softened unsalted butter and brown sugar. Use a hand mixer or a spatula to cream them together until the mixture is light and fluffy, which should take about 2-3 minutes. This process aerates the butter, giving your crust that perfect texture. You should see a pale, creamy consistency before moving on.
Step 3: Combine the Dry Ingredients
Gradually sift in the all-purpose flour, baking powder, and salt into the bowl. With a spatula, gently fold the ingredients together until just combined, being careful not to overmix. The dough should come together, forming a slightly crumbly texture that holds its shape. It’s fine if a few streaks of flour remain.
Step 4: Form the Crust
Take approximately two-thirds of the dough from the mixing bowl and press it evenly into the bottom of your prepared baking pan. Use your hands or the back of a measuring cup to ensure an even layer that covers the entire surface. This will be the sturdy base for your Turtle Bars with Caramel and Pecans.
Step 5: Add the Caramel Sauce
Pour your caramel sauce evenly over the crust you've just formed. Use a spatula to spread it out gently, ensuring it reaches all corners. The caramel layer adds a sweet, gooey richness that pairs perfectly with the pecans and crust, setting the stage for a delectable dessert.
Step 6: Sprinkle the Pecans
Next, evenly sprinkle the chopped pecans over the caramel topping. This adds a delightful crunch that contrasts beautifully with the chewy caramel. For an extra touch of flavor, consider toasting the pecans lightly before this step—just 5-7 minutes in a dry skillet will enhance their nutty aroma.
Step 7: Crumble the Remaining Dough
Crumble the remaining dough you set aside earlier on top of the pecans and caramel. This creates a rustic, textured finish to your Turtle Bars with Caramel and Pecans. Be sure not to compact the crumble too much; a light, airy layer will ensure a delightful bite when you finally cut into the bars.
Step 8: Bake to Perfection
Place the baking pan in the preheated oven and bake for 25-30 minutes. Keep an eye on the bars; they should turn golden brown and become bubbly around the edges, which indicates that the caramel is reaching that perfect gooey consistency.
Step 9: Cool and Slice
Once baked, remove the pan from the oven and allow the bars to cool completely in the pan. This step is vital; cooling helps the bars firm up, which makes slicing easier and maintains their delightful texture. After about 1-2 hours, you can cut them into squares and serve.
Turtle Bars with Caramel and Pecans: Variations & Substitutions
Feel free to get creative and personalize these delightful turtle bars to suit your taste buds!
-
Nut-Free: Substitute pecans with chopped dried fruits like cranberries or apricots for a delightful chewy texture. This twist allows everyone to enjoy them, regardless of nut allergies.
-
Chocolate-Lovers: For a chocolatey twist, drizzle melted chocolate over the cooled bars. This adds an extra layer of sweetness and makes for a stunning presentation that’s sure to impress.
-
Salted Caramel: Enhance your bars by adding a pinch of sea salt to the caramel sauce. The salty-sweet combination elevates the overall flavor, giving your bars a gourmet touch.
-
Oat Crust: Replace half of the all-purpose flour with rolled oats for an oatmeal-style crust. This adds a heartier texture and a lovely chew that complements the caramel perfectly.
-
Spiced Up: Add a quarter teaspoon of cinnamon or nutmeg to the crust mixture for a hint of warmth and spice. The aroma while baking will have your kitchen smelling heavenly!
-
Peanut Butter Infusion: Mix in a few tablespoons of creamy peanut butter into the crust for a rich flavor addition. The nutty notes pair beautifully with the caramel and pecans.
-
Caramel Swirl: Instead of drizzling caramel on top, swirl it into the batter before baking for pockets of gooey goodness throughout. Every bite will be a surprise!
-
Gluten-Free: For a gluten-free version, replace the all-purpose flour with a one-to-one gluten-free baking flour. This allows everyone to indulge without missing out.
Explore these variations to create your own unique version of turtle bars! And if you're looking for more delightful treats, check out these easy caramel treats or indulge in these mouthwatering chocolate desserts for your next baking adventure!
Make Ahead Options
These Turtle Bars with Caramel and Pecans are fantastic for meal prep and can save you valuable time during busy weeks! You can prepare the crust and even the caramel layer up to 24 hours in advance; simply store the dough in an airtight container in the refrigerator to maintain durability. If making the caramel at home, chill it overnight to ensure it's pourable when you're ready to assemble. When it’s time to bake, press the crust into the baking pan, pour the chilled caramel over it, add the pecans, and crumble the topping before baking. After cooling completely, slice them into squares and enjoy a delicious treat that tastes just as good as fresh!
Storage Tips for Turtle Bars with Caramel and Pecans
Room Temperature: Keep the bars at room temperature for up to 3 days in an airtight container. This helps maintain their chewy texture.
Fridge: For longer freshness, store the turtle bars in the refrigerator for up to one week. Ensure they’re sealed well to prevent them from drying out.
Freezer: Freeze the bars by wrapping them tightly in plastic wrap and then placing them in a freezer-safe container. They can last for up to three months.
Reheating: To enjoy a warm treat, reheat individual squares in the microwave for about 10-15 seconds. This revives the gooey caramel and brings back their delightful flavors.
What to Serve with Turtle Bars with Caramel and Pecans
These tempting treats are the perfect culmination of flavors and textures, making them an excellent addition to any gathering or leisurely afternoon delight.
-
Rich Vanilla Ice Cream: A scoop of creamy vanilla ice cream pairs beautifully with the warm bars, enhancing their sweet caramel flavors while adding a cooling contrast.
-
Whipped Cream: The light, airy texture of freshly whipped cream complements the heaviness of the caramel and pecans, offering a delightful balance of lightness and richness in every bite.
-
Coffee: A hot cup of coffee can perfectly bridge the sweet and nutty profiles of the turtle bars, awakening your palate and accentuating the delicacies of caramel and pecans.
-
Chocolate Sauce Drizzle: If you're a chocolate lover, drizzling warm chocolate sauce over the bars ties in a luxurious element, deepening the overall flavor experience and adding a touch of decadence.
-
Fresh Berries: Bright and juicy berries such as raspberries or strawberries bring a fresh, tart contrast to the sweet bars, offering a refreshing finish and a pop of color to your dessert table.
-
Nutty Snack Mix: A crunchy nut and seed mix can enhance the pecan flavor while adding a variety of textures; it makes for a delightful contrast to the chewy turtle bars and is perfect for snacking on.
-
Sweet Tea or Lemonade: Enjoying the bars with a glass of homemade sweet tea or tangy lemonade balances the sweetness with a refreshing zing, making every bite feel like a sunny afternoon treat.
-
Milk: A classic pairing, a glass of cold milk creates the perfect combination of flavors, soaking into the bars' chewy texture for a nostalgic experience that takes you back to childhood.
Expert Tips for Turtle Bars with Caramel and Pecans
Cool Completely: Let the bars cool entirely before slicing; this prevents them from falling apart and maintains their chewy texture.
Nut-Free Option: Replace pecans with chopped dried fruits like cranberries or apricots for a delightful alternative that still offers great flavor.
Watch the Oven: Keep an eye on the baking time; ovens can vary, and you want to avoid overbaking to ensure that the caramel remains gooey.
Proper Dough Crumbling: When crumbling the remaining dough on top, do not compact it too much. A light, airy layer ensures a perfect finish to your Turtle Bars with Caramel and Pecans.
Use Quality Caramel: For the richest flavor, opt for high-quality caramel sauce. Homemade is excellent if you have the time, but store-bought works well too!

Turtle Bars with Caramel and Pecans Recipe FAQs
How do I choose ripe ingredients for my turtle bars?
Absolutely! For the best results, use fresh, high-quality pecans that are firm and free from dark spots. If you’re using store-bought caramel sauce, make sure it’s pourable and not overly thick. As for the unsalted butter, it’s best when at room temperature for easy mixing, ensuring a creamy consistency when combined with the brown sugar.
How should I store leftover turtle bars?
Very! Store your turtle bars with caramel and pecans in an airtight container at room temperature for up to 3 days. To extend freshness, you can refrigerate them for up to one week. Make sure they’re properly sealed to avoid drying out. If you want to store them for longer, consider freezing them!
Can I freeze turtle bars, and if so, how?
Certainly! To freeze your turtle bars, first, allow them to cool completely. Wrap each square tightly in plastic wrap to protect them from freezer burn. Then, place the wrapped bars in a freezer-safe container. They can last for up to three months. When you're ready to enjoy, just thaw them overnight in the refrigerator or let them sit at room temperature for a while.
What if my bars turn out crumbly or fall apart when cutting?
No worries! If your turtle bars are crumbling, it may be due to not letting them cool completely before slicing. For best results, allow them to cool for at least 1-2 hours in the pan; this helps the caramel set and binds everything together more effectively. If they still fall apart, consider using more butter or adjusting the flour ratio next time for better structure.
Are there any dietary considerations I need to keep in mind for these bars?
Very! If anyone in your family has nut allergies, you can swap out pecans for chopped dried fruits like cranberries or apricots, which still add a sweet flavor and chewy texture. Always double-check for allergies with the caramel sauce as some brands may include traces of nuts. Additionally, you can use gluten-free flour if that’s a concern for guests at your gathering!
Can I add extra ingredients, like different nuts or chocolate?
Absolutely! Feel free to mix things up! You can replace pecans with walnuts or almonds for a different flavor profile. For a chocolatey twist, drizzle melted chocolate over the top after the bars have cooled. Just remember to adjust the sweetness if you're adding more chocolate chips to keep that perfect balance!
Irresistibly Easy Turtle Bars with Caramel and Pecans
Ingredients
Equipment
Method
- Preheat your oven to 350°F (175°C) and prepare your baking pan.
- In a bowl, cream together the unsalted butter and brown sugar until fluffy.
- Sift in the flour, baking powder, and salt, then fold until combined.
- Press two-thirds of the dough into the bottom of the baking pan.
- Pour caramel sauce over the crust evenly.
- Sprinkle chopped pecans over the caramel layer.
- Crumble the remaining dough on top without compacting.
- Bake for 25-30 minutes until golden brown.
- Allow to cool completely before slicing into bars.

Leave a Reply