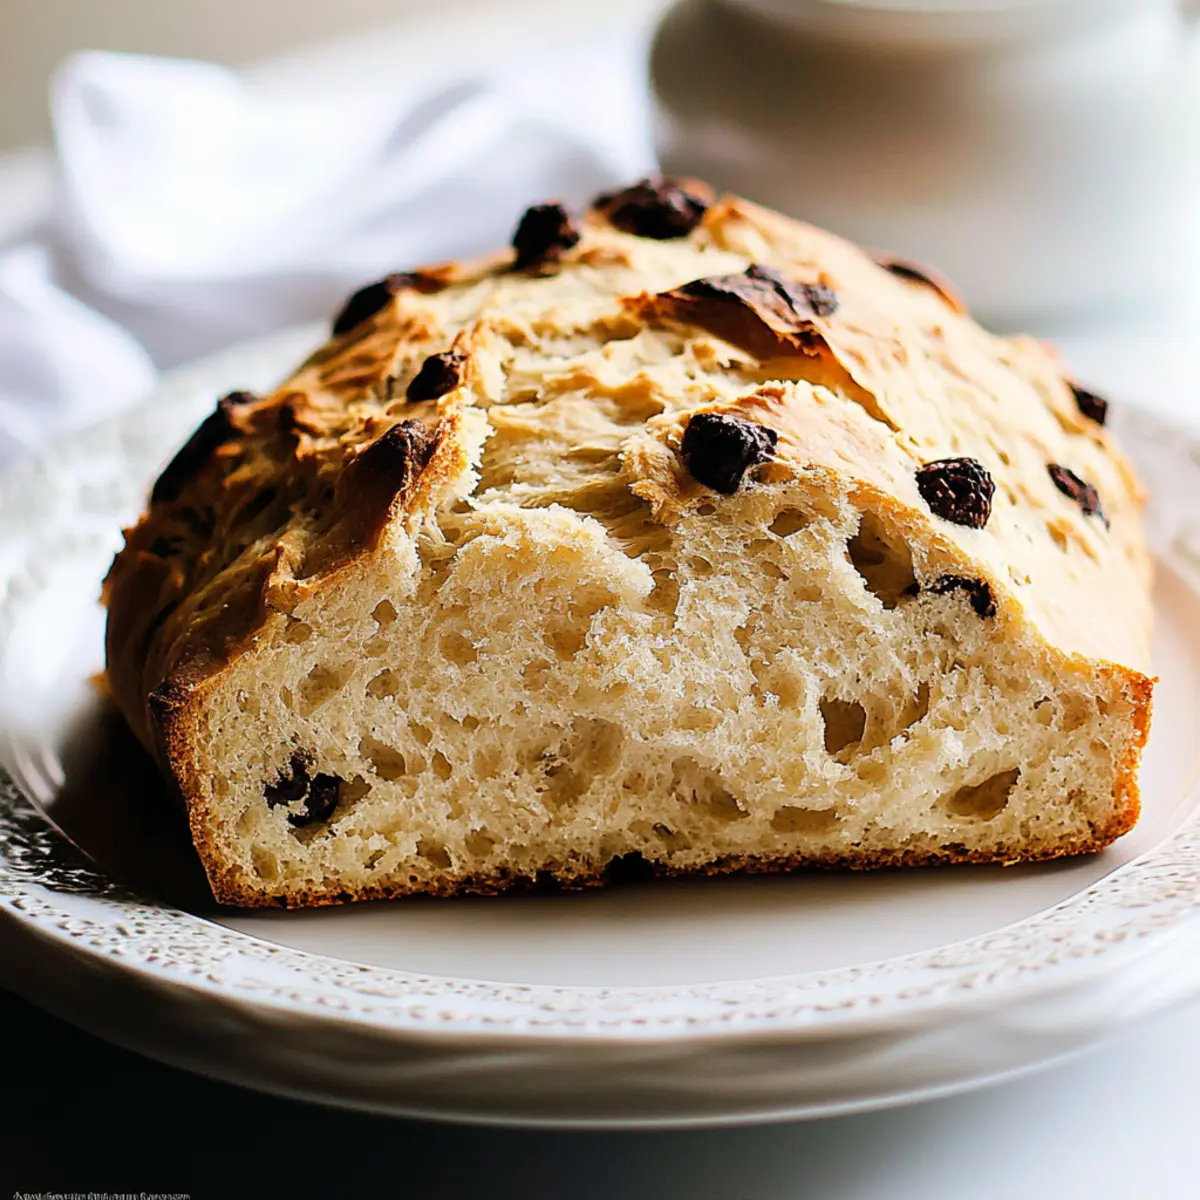
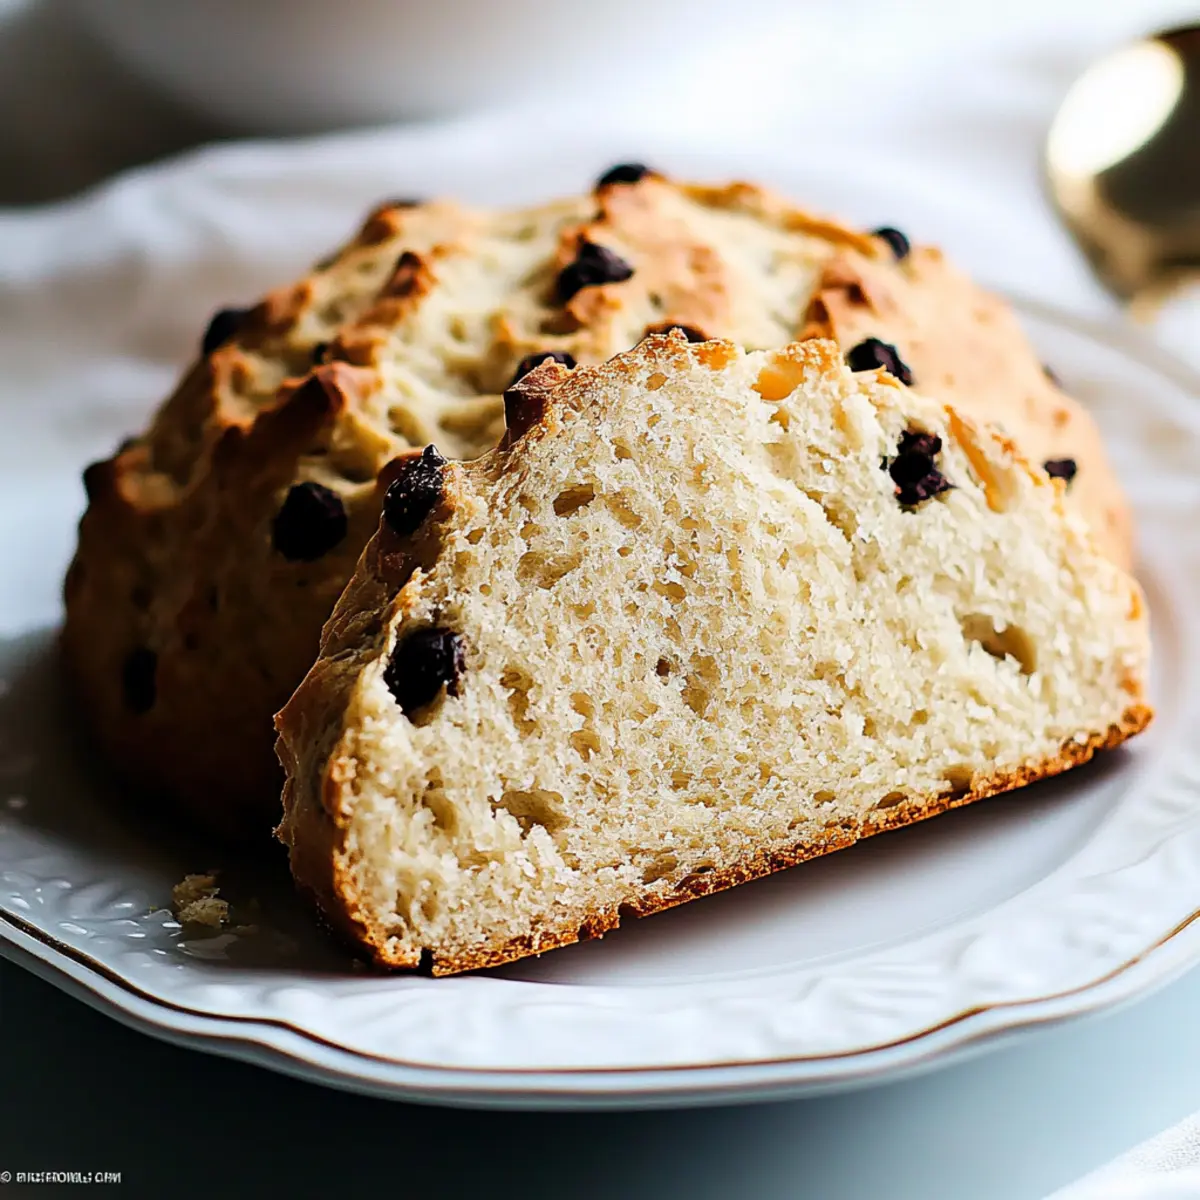
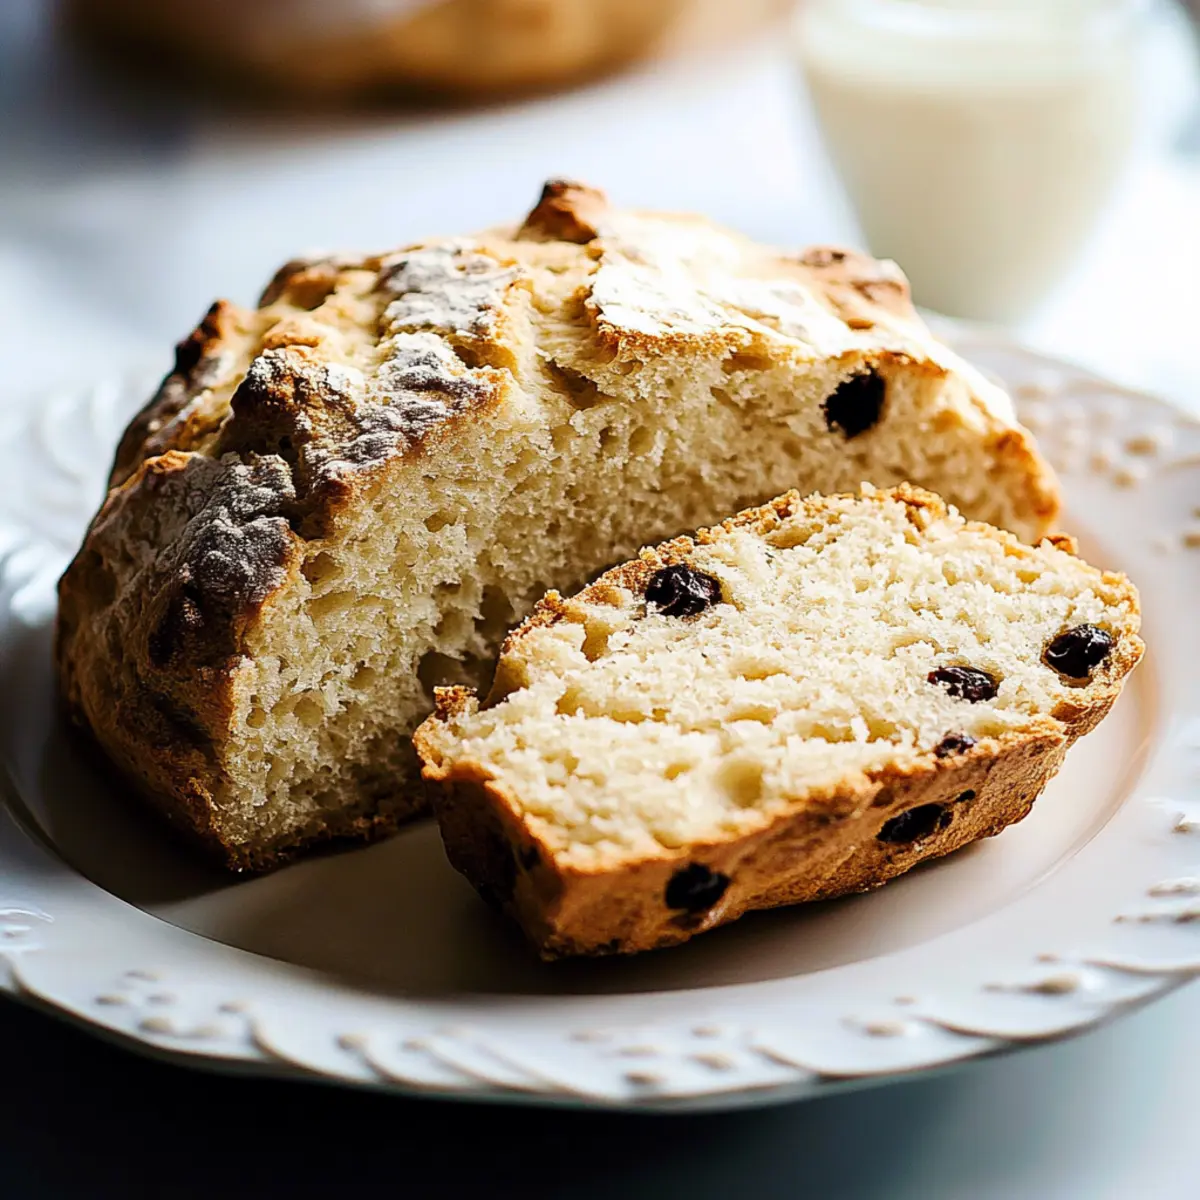
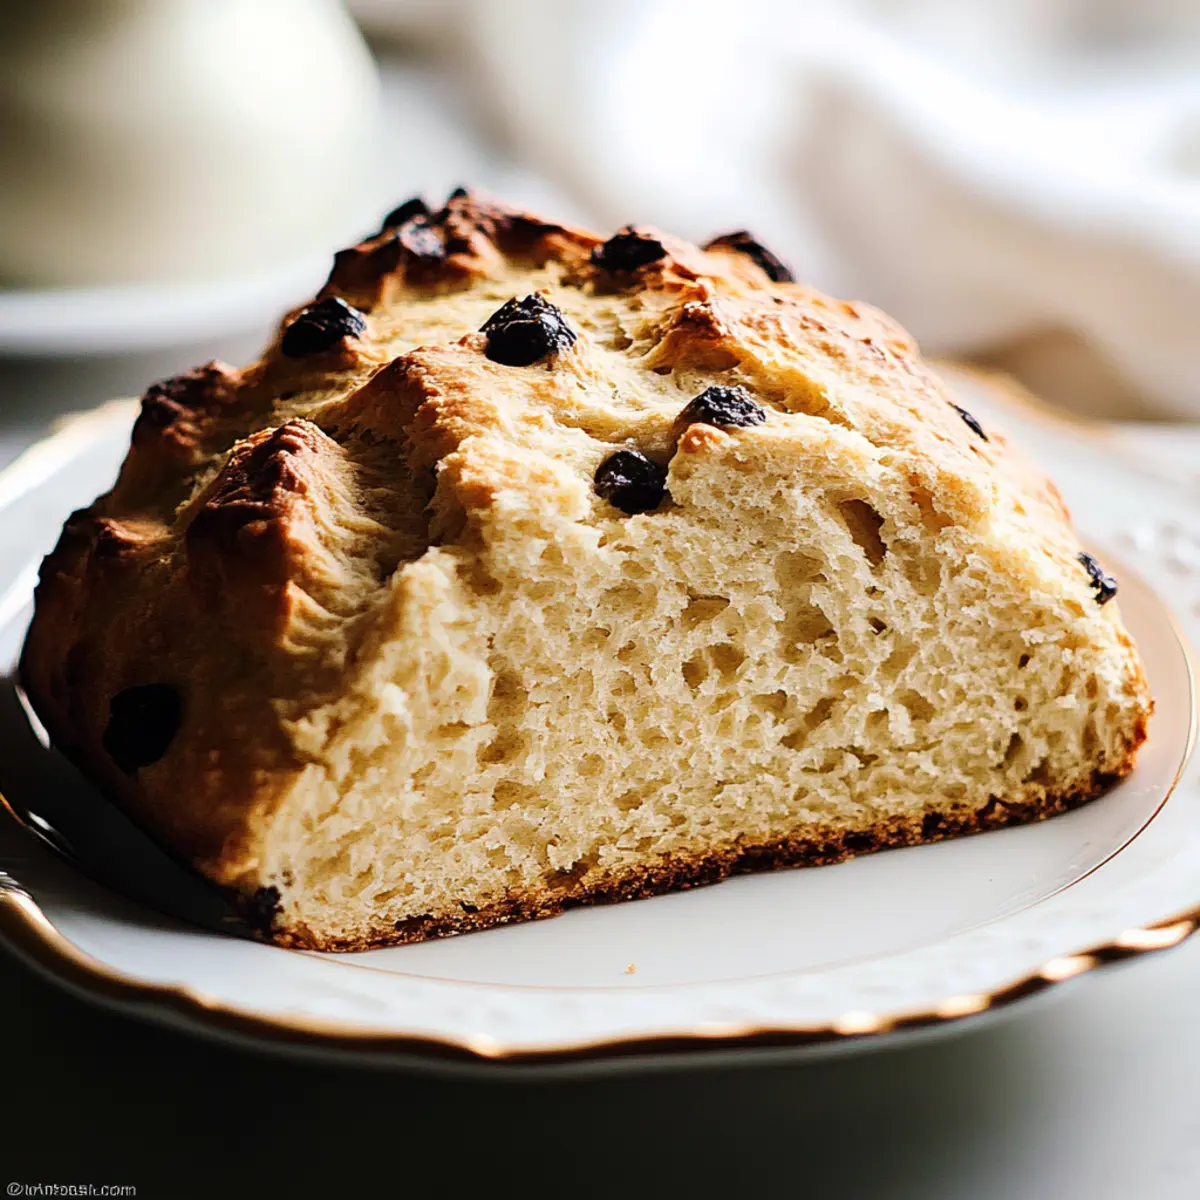
As the sun rises, I find myself surrounded by the rich, warm scent of freshly baked bread—more specifically, my beloved Irish soda bread. This quick and traditional delight transforms any morning into a comforting experience, with a golden crust that crackles ever so slightly as you slice into its tender heart. Imagine gathering around the table, where each warm slice practically begs for a generous spread of butter or a dollop of homemade jam. The best part? This Irish soda bread is not just a true crowd-pleaser but also a breeze to whip up, making it the perfect addition to any family gathering. So, are you ready to embrace the joy of baking this scrumptious bread? Let's get started!
Why Is Irish Soda Bread So Special?
Tradition Meets Ease: This recipe captures the essence of traditional Irish soda bread while being incredibly quick to prepare.
Golden Crust: The delightful crisp crust contrasts beautifully with the soft, tender interior, making each slice irresistible.
Perfect for Any Occasion: Whether it's a family breakfast or a cozy dinner, this bread serves as a perfect crowd-pleaser that pairs wonderfully with soups or stews.
Endless Variations: Feel free to get creative! Add herbs like rosemary or even sweet ingredients like raisins to tailor this bread to your taste.
Quick and Reliable: With minimal ingredients and a fast baking time, you'll find this recipe is a go-to for any home cook looking to impress!
Satisfyingly Simple: Even a novice baker can achieve bakery-quality results that will have everyone asking for the recipe!
Irish Soda Bread Ingredients
• Here’s everything you need to create this quick and delightful bread!
For the Dough
- All-Purpose Flour – Essential for structure; choose high-quality for the best texture.
- Baking Soda – The key leavening agent; make sure it’s fresh for a proper rise.
- Salt – Boosts the flavor; kosher salt is preferred for better control.
- Buttermilk – Adds a unique tang; substitute with milk mixed with vinegar if necessary.
- Butter – Unsalted for a richer taste; avoids introducing unwanted saltiness.
Optional Add-Ins
- Herbs (e.g., rosemary, thyme) – Infuse a lovely aroma and flavor for a delightful twist.
- Raisins or Caraway Seeds – Mix in for added texture and a hint of sweetness or earthiness.
Feel free to explore these tips and variations while making your Irish soda bread—it's sure to be a hit at your next gathering!
Step‑by‑Step Instructions for Perfect Irish Soda Bread
Step 1: Preheat the Oven
Begin by preheating your oven to 425°F (220°C). This temperature is crucial for achieving that perfect golden crust on your Irish soda bread. While the oven is heating up, gather your baking sheet and line it with parchment paper to ensure an easy release of the bread once baked.
Step 2: Mix Dry Ingredients
In a large mixing bowl, whisk together all-purpose flour, baking soda, and salt until light and airy. This step ensures that the baking soda is evenly distributed, which is vital for the proper rise of your Irish soda bread. The dry mixture should look fluffy, and you'll want to create a well in the center for the wet ingredients later.
Step 3: Combine Wet Ingredients
Gently pour the buttermilk and melted unsalted butter into the well you created in the dry ingredients. Using a wooden spoon or your hands, stir the mixture until it just comes together, being careful not to over-mix. You are looking for a slightly sticky dough that will be transformed into delightful Irish soda bread.
Step 4: Knead the Dough
Lightly flour your working surface and turn the dough out onto it. Knead the dough gently for about 30 seconds, just until it holds together. Avoid excessive kneading to keep the bread tender. The dough should feel soft and slightly tacky to the touch, ready to take on its final shape.
Step 5: Shape the Bread
Shape the dough into a round loaf, aiming for about 1-½ inches in thickness. Once formed, transfer the loaf to your prepared baking sheet. Using a sharp knife, score a deep “X” on the top, which helps the bread cook evenly and adds a rustic charm to your Irish soda bread.
Step 6: Bake the Bread
Place the bread in the preheated oven and bake for about 30 minutes. You’ll know it’s ready when the crust is golden brown and the loaf sounds hollow when tapped on the bottom. Keep an eye on it during the last few minutes, as this is when it gains that perfect golden hue.
Step 7: Cool and Serve
Once baked, remove the Irish soda bread from the oven and let it cool on a wire rack for at least 10 minutes. This cooling time allows the interior to set and makes it easier to slice. Serve warm with butter or your favorite homemade jam, and watch as it quickly disappears from the table!
What to Serve with Perfect Irish Soda Bread
The essence of home-cooked comfort shines brightly as you create a full meal around this delightful bread.
- Creamy Butter: A simple but essential pairing; the rich creaminess enhances the bread's warm, tender crumb beautifully.
- Hearty Vegetable Soup: The robust flavors and texture of a chunky soup create a warm hug alongside each slice, making it a hearty meal.
- Savory Stews: A rich beef or lamb stew complements the bread perfectly, welcoming the crusty slices for dipping in savory sauce.
- Zesty Salad: A fresh, tangy salad with citrus vinaigrette provides a vibrant contrast that awakens the palate alongside the mild bread.
- Homemade Jam: Sweet, fruity jams spread over warm slices create a delectable sweet contrast that's perfect for a lovely breakfast or afternoon snack.
- Cheese Board: Pair slices of Irish soda bread with a selection of cheeses; the flavors play off each other while offering delightful textures.
- Stout Beer: Enjoy this traditional drink with the bread for an authentic Irish experience, highlighting the bread’s simplicity and richness.
- Vanilla Ice Cream: For a delightful twist, serve slices topped with warm bread pudding, blending warm and cold for a unique dessert experience.
Make Ahead Options
Irish soda bread is a fantastic choice for meal prep! You can prepare the dry ingredients (flour, baking soda, and salt) up to 3 days in advance by mixing them and storing them in an airtight container. For the best taste, wait to combine with wet ingredients until you're ready to bake. Alternatively, you can mix the dough and place it in the refrigerator for up to 24 hours. This helps deepen the flavors while maintaining a fresh texture. Just be sure to shape and bake it straight from the fridge—your Irish soda bread will be just as delicious as if made fresh, giving you an indulgent treat with minimal effort during busy weeknights!
Expert Tips for Perfect Irish Soda Bread
-
Ingredient Freshness: Always check that your baking soda and buttermilk are fresh. Stale ingredients can lead to a flat loaf instead of a light and fluffy Irish soda bread.
-
Gentle Mixing: Avoid over-mixing the dough. Stir just until combined to keep the final bread tender and soft; over-kneading can make it tough.
-
Color & Texture Check: Look for a deep golden crust and the hollow sound when tapping the bottom. These are the perfect indicators that your bread is done baking!
-
Scoring Technique: When scoring the “X” on top, make sure it goes at least ½ inch deep. This allows for proper expansion and helps the bread cook evenly.
-
Serve Warm: For the best experience, serve fresh Irish soda bread warm from the oven with a generous spread of butter or your favorite jam. It enhances the flavor and texture beautifully!
Irish Soda Bread Variations & Substitutions
Feel free to let your creativity shine and tailor this delightful bread to your taste with these fun and easy swaps!
-
Dairy-Free: Substitute buttermilk with almond milk mixed with lemon juice for a smooth dairy-free option.
Try this twist if you're looking to accommodate lactose intolerance. The flavor will still be comforting and inviting! -
Herb-Infused: Add 2 tablespoons of fresh rosemary or thyme to the dry ingredients for a fragrant, savory kick.
The aroma that fills your kitchen will have everyone eagerly waiting for a slice! -
Sweet Touch: Mix in ¾ cup of raisins or dried cranberries for a sweet surprise.
These little gems will add a delightful chewiness, transforming your soda bread into a sweet treat for breakfast or a snack. -
Texture Boost: Incorporate ½ cup of oats into the flour mix for added texture and heartiness.
This slight variation introduces a delightful chew that complements the bread’s traditional softness. -
Spicy Heat: Add crushed red pepper flakes or jalapeños in the dough for a warm, spicy twist.
Give your bread a comforting kick that pairs beautifully with creamy soups and stews. -
Caraway Delight: Stir in 1 tablespoon of caraway seeds for a hint of traditional flavor.
If you’re a fan of rye bread, this will evoke memories of family gatherings and comforting meals. -
Nutty Goodness: Fold in ½ cup of chopped walnuts or pecans for a crunchy contrast.
The nutty flavor will make your Irish soda bread even more satisfying! -
Gluten-Free: Use a gluten-free all-purpose flour blend as a direct substitute for regular flour.
This version ensures everyone can enjoy the warmth and pleasure of homemade Irish soda bread without worry!
How to Store and Freeze Irish Soda Bread
Room Temperature: Keep leftover Irish soda bread in an airtight container at room temperature for up to 3 days to maintain its freshness.
Freezer: To preserve the bread for longer, wrap it tightly in plastic wrap or aluminum foil and freeze for up to 3 months. This way, you can enjoy warm slices anytime!
Reheating: When ready to enjoy, simply thaw the bread at room temperature or toast slices directly from the freezer for a delightful crunch.
Perfect Irish Soda Bread Recipe FAQs
How do I choose the right buttermilk for Irish soda bread?
Absolutely! When selecting buttermilk, look for fresh, full-fat varieties as they yield the best flavor and texture. If you’re in a pinch and don't have buttermilk on hand, you can easily create a substitute by combining one cup of milk with one tablespoon of vinegar or lemon juice. Let it sit for about 5-10 minutes until it thickens slightly, and you’re all set!
How should I store leftover Irish soda bread?
To keep your Irish soda bread fresh, store any leftovers in an airtight container at room temperature for up to 3 days. Make sure it’s completely cooled before sealing, as this prevents moisture buildup that can lead to sogginess. Enjoy it as-is or toast it lightly for a delightful breakfast treat.
Can I freeze Irish soda bread?
Very! Freezing is a great option for preserving your Irish soda bread. Wrap it tightly in plastic wrap or aluminum foil to prevent freezer burn, and it will stay fresh for up to 3 months. When you’re ready to enjoy a slice, thaw it at room temperature or toast directly from frozen for a satisfying crunch!
What should I do if my soda bread doesn’t rise properly?
One common issue could be stale baking soda! Make sure your baking soda is fresh, as it’s the leavening agent that gives soda bread its rise. If you find the dough is too dense, try gently mixing just until combined. Remember, over-kneading can also lead to a tough texture, so be sure to knead gently!
Are there any dietary considerations for Irish soda bread?
Certainly! This recipe contains gluten from all-purpose flour, so it may not be suitable for those with gluten intolerance or celiac disease. For a gluten-free alternative, consider using a gluten-free all-purpose flour blend, but be sure to add a binding agent like xanthan gum to help maintain the bread’s structure. Always double-check ingredient labels for potential allergens as well!
Irresistibly Easy Irish Soda Bread: A Warm Family Favorite
Ingredients
Equipment
Method
- Preheat your oven to 425°F (220°C) and line a baking sheet with parchment paper.
- In a large mixing bowl, whisk together all-purpose flour, baking soda, and salt until light and airy.
- Gently pour the buttermilk and melted unsalted butter into the well created in the dry ingredients. Stir until just combined.
- Lightly flour your working surface and knead the dough gently for about 30 seconds until it holds together.
- Shape the dough into a round loaf about 1-½ inches thick and transfer to the prepared baking sheet. Score a deep “X” on top.
- Bake for about 30 minutes or until the crust is golden brown and sounds hollow when tapped.
- Remove from the oven and let it cool on a wire rack for at least 10 minutes before serving warm with butter or jam.


Leave a Reply