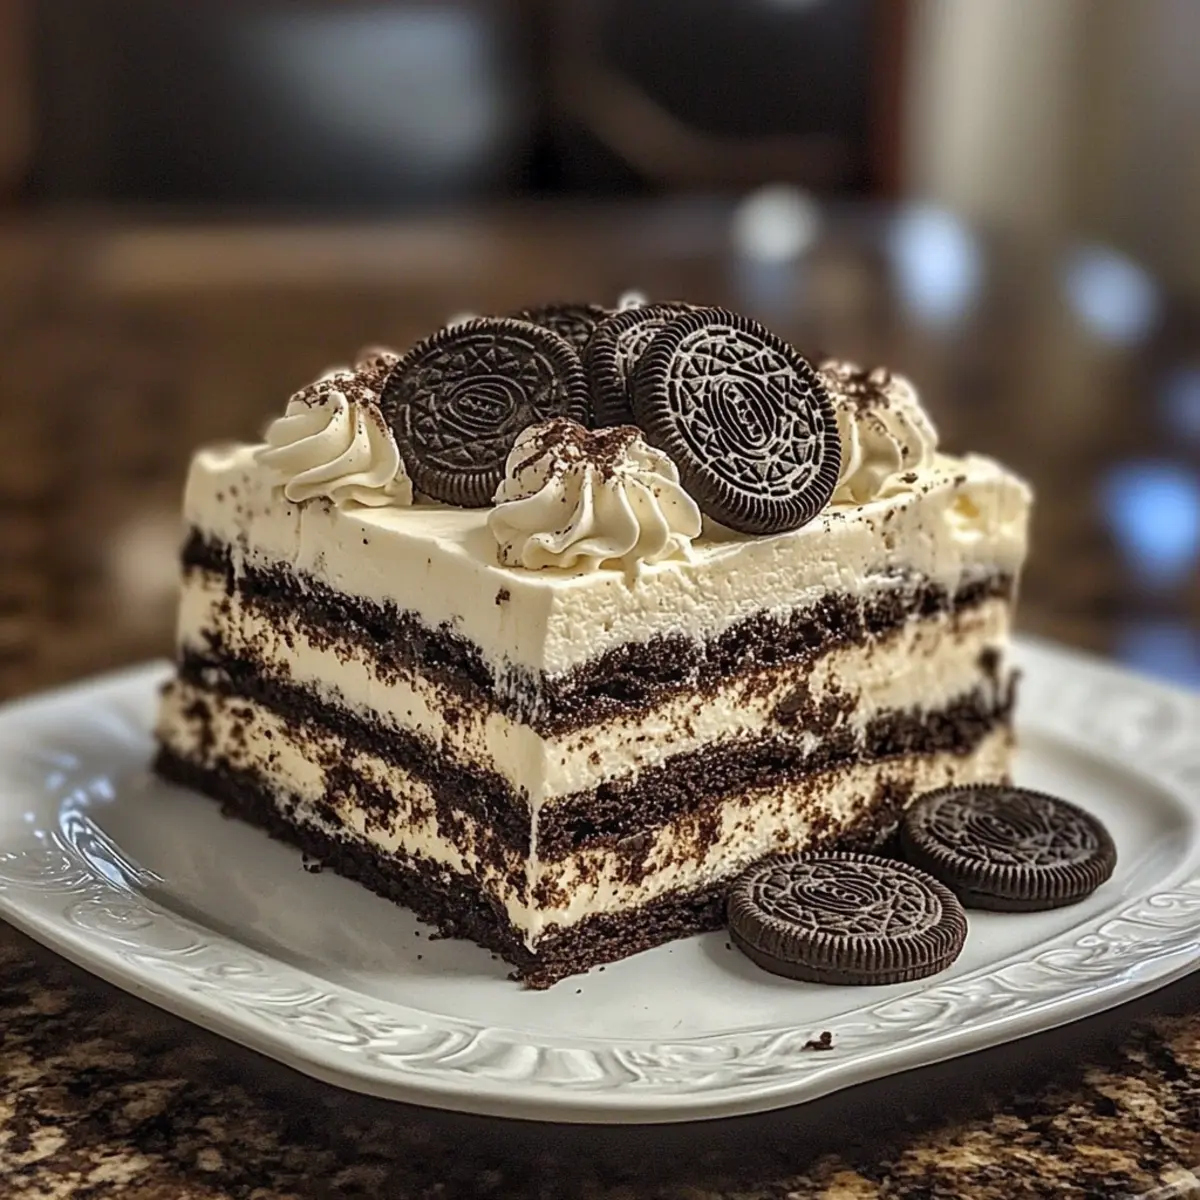
While rummaging through the pantry one afternoon, I stumbled upon a box of Oreo cookies just waiting to be transformed into something special. Enter the Ultimate No-Bake Oreo Icebox Cake! This indulgent dessert serves as a perfect canvas for creamy whipped goodness layered between chocolatey cookie delights. Not only is it a budget-friendly treat that comes together in a snap, but it can also be made in advance, freeing up your time for family or friends. Each peaceful slice melts in your mouth, offering a delightful contrast of textures that’s simply irresistible. Whether you're serving it at a summer barbecue or a cozy family dinner, this Oreo Icebox Cake is bound to be the star of the show. Curious to see how to whip up this sensational dessert? Let’s dive into the recipe!
Why is Oreo Icebox Cake a Must-Try?
Simplicity at Its Finest: This recipe requires no baking, making it perfect for busy days when you crave something sweet without the fuss.
Decadent Layers: Experience delicious layers of whipped cream and chocolate cookies that create a luxurious treat.
Versatile Options: Customize your cake by incorporating seasonal flavors or mix-ins like fresh berries or nut butter for an exciting twist.
Perfect Make-Ahead: Prepare this cake in advance, saving you time and stress for gatherings or weeknight desserts.
Crowd-Pleasing Delight: Whether for dinner parties or casual hangouts, this dessert is guaranteed to impress friends and family alike! Dive into the world of no-bake magic with this delectable Oreo Icebox Cake.
Oreo Icebox Cake Ingredients
• Discover all you need for the delicious Oreo Icebox Cake!
For the Cake Base
- Oreo Cookies – These provide the delightful chocolatey flavor and structure for your icebox cake; feel free to substitute with any favorite cookie variety!
- Heavy Cream (35% fat) – Essential for that rich and creamy texture; avoid lighter creams to maintain the indulgence of your Oreo Icebox Cake.
- Powdered Sugar – Ensures a smooth sweetness in the whipped cream; granulated sugar can be used but may result in a grittier texture.
- Vanilla Extract – Elevates the flavor profile; you can swap it out for almond extract or even coffee liqueur for exciting variations!
Optional Layering Add-Ons
- Fresh Berries – Add vibrant berries like strawberries or raspberries for a refreshing twist on your layers; their brightness complements the creaminess beautifully.
- Flavored Pudding Mix – Incorporate chocolate or vanilla pudding for added flavor and textural contrast; this can help customize your Oreo Icebox Cake for different occasions.
- Nut Butter – A spoonful of nut butter mixed into the whipped cream lends a nutty flavor that enhances the overall richness of the dessert.
Now, with these tasty ingredients gathered, you’re one step closer to creating a memorable Oreo Icebox Cake that everyone will adore!
Step‑by‑Step Instructions for Oreo Icebox Cake
Step 1: Chill Mixing Tools
Begin by placing your mixing bowl and beaters in the refrigerator for about 15 minutes. This will ensure they are nice and cold, helping the heavy cream whip up beautifully. When ready, gather your ingredients to make the Oreo Icebox Cake easier to assemble.
Step 2: Whip the Cream
Pour the chilled heavy cream into the cold mixing bowl. Using an electric mixer, beat the cream on medium speed until it thickens slightly—this should take about 1-2 minutes. Keep an eye on the cream as it begins to fluff up, preparing it for the next step.
Step 3: Add Sweetness and Flavor
Gradually add the powdered sugar and vanilla extract while increasing the mixer speed to high. Continue mixing the cream for another 3-5 minutes until stiff peaks form, meaning the whipped cream should hold a firm shape when you lift the beaters. This rich texture will be the star of your Oreo Icebox Cake!
Step 4: Create the Base Layer
Spread a thin layer of whipped cream in the bottom of a 9x13-inch dish. This base layer is crucial as it will anchor the Oreo cookies in place, preventing them from sinking. Use a spatula to evenly distribute the whipped cream so it's smooth and inviting.
Step 5: Layer the Oreo Cookies
Arrange whole Oreo cookies in a single layer over the whipped cream. Feel free to break a few cookies into pieces to fill any gaps, ensuring an even distribution. This chocolatey layer adds depth and crunch to the irresistible Oreo Icebox Cake you’re creating.
Step 6: Repeat Layers
Continue layering by spreading another layer of whipped cream over the cookies. Then, add another layer of Oreo cookies, repeating the process until all ingredients are used. Make sure the final layer is whipped cream to maintain a beautiful presentation when serving your delicious dessert.
Step 7: Chill and Set
Cover the assembled Oreo Icebox Cake with plastic wrap and refrigerate for at least 4 hours, though overnight is even better. This chilling time allows the cookies to soften and flavors to meld beautifully, culminating in a delightful dessert that will have everyone coming back for seconds.
Step 8: Serve and Enjoy
Once chilled, slice the cake into squares and serve cold. For an optional garnish, consider adding crushed Oreos on top or a drizzle of chocolate sauce for extra flair. This Oreo Icebox Cake will surely impress your family and friends with its rich flavors and creamy textures!
Make Ahead Options
These Oreo Icebox Cake preparations make your life so much easier! You can prepare the whipped cream and layer it with the Oreo cookies up to 24 hours in advance. Simply whip the cream and layer it with the cookies in your dish, then cover tightly with plastic wrap and refrigerate. For the best texture, it's ideal to serve the cake within 3 days of preparation, as the cookies will absorb moisture and soften beautifully, providing that delightful contrast in texture. When ready to serve, simply slice and enjoy—this no-bake dessert will remain just as delicious, proving perfect for busy weeknights or surprise gatherings!
Oreo Icebox Cake Variations
Feel free to play around with this delightful dessert and make it your own with these exciting twists!
-
Dairy-Free: Substitute heavy cream with a coconut cream or non-dairy whipped topping for a creamy alternative. The tropical flavor-enhances this classic while keeping it indulgent.
-
Gluten-Free: Swap Oreo cookies for gluten-free chocolate sandwich cookies, ensuring everyone can enjoy a taste of delight without any dietary concerns.
-
Fruity Burst: Layer fresh strawberries, raspberries, or bananas in between the cookies for a refreshing fruity twist. The sweet and tart contrast elevates the dessert to new heights.
-
Nutty Flavor: Mix in a spoonful of almond butter or peanut butter into the whipped cream for a nutty depth. It's a sublime addition with a wonderful twist that adds richness.
-
Chocolate Lovers: Enhance the chocolate factor by using chocolate pudding powder mixed into the whipped cream. The extra chocolaty flavor makes your Oreo Icebox Cake even more irresistible.
-
Seasonal Options: For a festive flair, incorporate pumpkin spice pudding during the fall or peppermint extract in winter—a clever way to celebrate the seasons!
-
No-Cook Sauce: Drizzle the dessert with homemade or store-bought chocolate or caramel sauce before serving. It adds an enticing touch and a decadent finish that's hard to resist.
With these variations, your Oreo Icebox Cake can continuously surprise and delight! For more ideas, you might want to check out how to effortlessly elevate your gatherings with a few simple tips and tricks. Enjoy the journey of creating delectable variations that speak to your heart and taste buds!
How to Store and Freeze Oreo Icebox Cake
Fridge: Store the Oreo Icebox Cake in an airtight container in the refrigerator for up to 3 days. For the best texture, it's ideal to enjoy it within the first two days.
Freezer: If you need to store it longer, wrap slices in plastic wrap and place them in a freezer-safe container. It can be frozen for up to 1 month.
Thawing: To enjoy frozen slices, transfer them to the fridge for several hours or overnight to thaw slowly, preserving the creamy texture.
Serving After Storage: Once thawed, serve the cake chilled, and if desired, add fresh toppings like chocolate sauce or crushed Oreos for an extra touch of delight.
Expert Tips for Oreo Icebox Cake
- Chill Your Tools: Ensure your mixing bowl and beaters are well-chilled before whipping. This helps achieve the perfect texture for your whipped cream in the Oreo Icebox Cake.
- Don’t Over-Whip: Mix the cream until stiff peaks form, but stop before it turns grainy or begins resembling butter. It’s essential for maintaining creaminess!
- Use Warm Water: For perfect slices, dip your knife in warm water and wipe it between cuts. This keeps the layers clean and appealing when serving your Oreo Icebox Cake.
- Make-Ahead Magic: Allow the cake to chill for ample time, preferably overnight, to ensure the cookies absorb moisture for that ideal soft texture.
- Get Creative: Feel free to customize your Oreo Icebox Cake with your favorite cookie flavors or seasonal fruits, adding a fresh twist!
What to Serve with Ultimate No-Bake Oreo Icebox Cake
Imagine a gathering filled with laughter, where the centerpiece dessert is a creamy indulgence that steals the show. This cake is a delightful start to building your meal.
-
Creamy Mashed Potatoes: The smooth texture and buttery flavor of mashed potatoes provide a comforting contrast to the Oreo Icebox Cake’s richness, enhancing your dining experience.
-
Fresh Fruit Salad: A bright, refreshing salad adds a burst of freshness that beautifully balances the decadence of the cake, making every bite lighter and invigorating.
-
Chocolate Dipped Strawberries: These luscious treats echo the chocolate flavor of the Oreos, offering an elegant touch and a deliciously sweet companion. Perfect for sharing!
-
Ice Cold Milk: Pairing this dessert with a tall glass of cold milk is a nostalgic classic that enhances the cookie flavor while ensuring a delightful creamy experience.
-
Caramel Drizzle: A drizzle of warm caramel or chocolate sauce over slices amplifies the sweetness and adds a decadent flair, making each serving even more enticing.
-
Mint Chocolate Chip Ice Cream: The coolness and minty undertones of this ice cream create a refreshing contrast, perfect for those warm evenings when you're relishing your dessert.
-
Espresso or Coffee: A cup of rich coffee or a shot of espresso complements the dessert’s sweetness, elevating your taste experience and bringing delightful depth.
-
Chocolate Chip Cookies: For those who can’t get enough cookies, serving classic chocolate chip cookies alongside the cake provides an enticing texture variation and extra sweetness.
Elevate your dessert experience and impress your guests with these delightful pairings that will transform your gathering into a memorable event!
Oreo Icebox Cake Recipe FAQs
How do I choose the right Oreo cookies?
Absolutely! For the best flavor and structure, use classic Oreo cookies, but feel free to get creative! Golden Oreos or seasonal flavors like peppermint or pumpkin spice can add fun variations to your cake. Just make sure the cookies are fresh—avoid any that have dark spots or an off smell.
How should I store the Oreo Icebox Cake?
You can store the Oreo Icebox Cake in an airtight container in the refrigerator for up to 3 days. It's best enjoyed within the first two days for the optimal texture since the cookies will gradually absorb moisture and soften.
Can I freeze the Oreo Icebox Cake?
Yes! To freeze, wrap individual slices in plastic wrap and place them in a freezer-safe container. The cake can be frozen for up to 1 month. When you're ready to enjoy, simply transfer the slices to the refrigerator for several hours or overnight to allow for a gradual thaw, which helps maintain that lovely creamy texture.
What if my whipped cream isn’t thickening properly?
Very! If your whipped cream isn't thickening as expected, ensure that the heavy cream is well-chilled before whipping. If it still doesn't whip up, check your mixer settings; start at a medium speed and gradually increase to high. If you've over-whipped it and it's becoming grainy, try folding in a bit of unwhipped cream to salvage it—this can help revive the silky texture.
Are there any dietary considerations for my guests?
Absolutely! This Oreo Icebox Cake is vegetarian-friendly. However, be mindful of guests with allergies to dairy or gluten, particularly since it contains heavy cream and Oreos. If you want to accommodate special dietary needs, consider using dairy-free whipped cream and gluten-free cookies for a delicious alternative!
Can I add additional flavors or ingredients to the cake?
Very! Feel free to add layers of fresh berries like strawberries or raspberries, or even your favorite flavored pudding mix for an exciting twist. Mixing in nut butter into the whipped cream can also create delightful variations! The more the merrier, so let your creativity shine in this dessert.
Indulge in the Best Oreo Icebox Cake You’ll Ever Make
Ingredients
Equipment
Method
- Chill your mixing bowl and beaters in the refrigerator for about 15 minutes.
- Pour the chilled heavy cream into the cold mixing bowl and beat on medium speed until it thickens slightly.
- Gradually add the powdered sugar and vanilla extract while increasing the mixer speed to high. Continue mixing until stiff peaks form.
- Spread a thin layer of whipped cream in the bottom of a 9x13-inch dish.
- Arrange whole Oreo cookies in a single layer over the whipped cream.
- Continue layering with whipped cream and Oreo cookies until all ingredients are used.
- Cover with plastic wrap and refrigerate for at least 4 hours or overnight.
- Slice the cake into squares and serve cold, adding optional garnishes if desired.


Leave a Reply