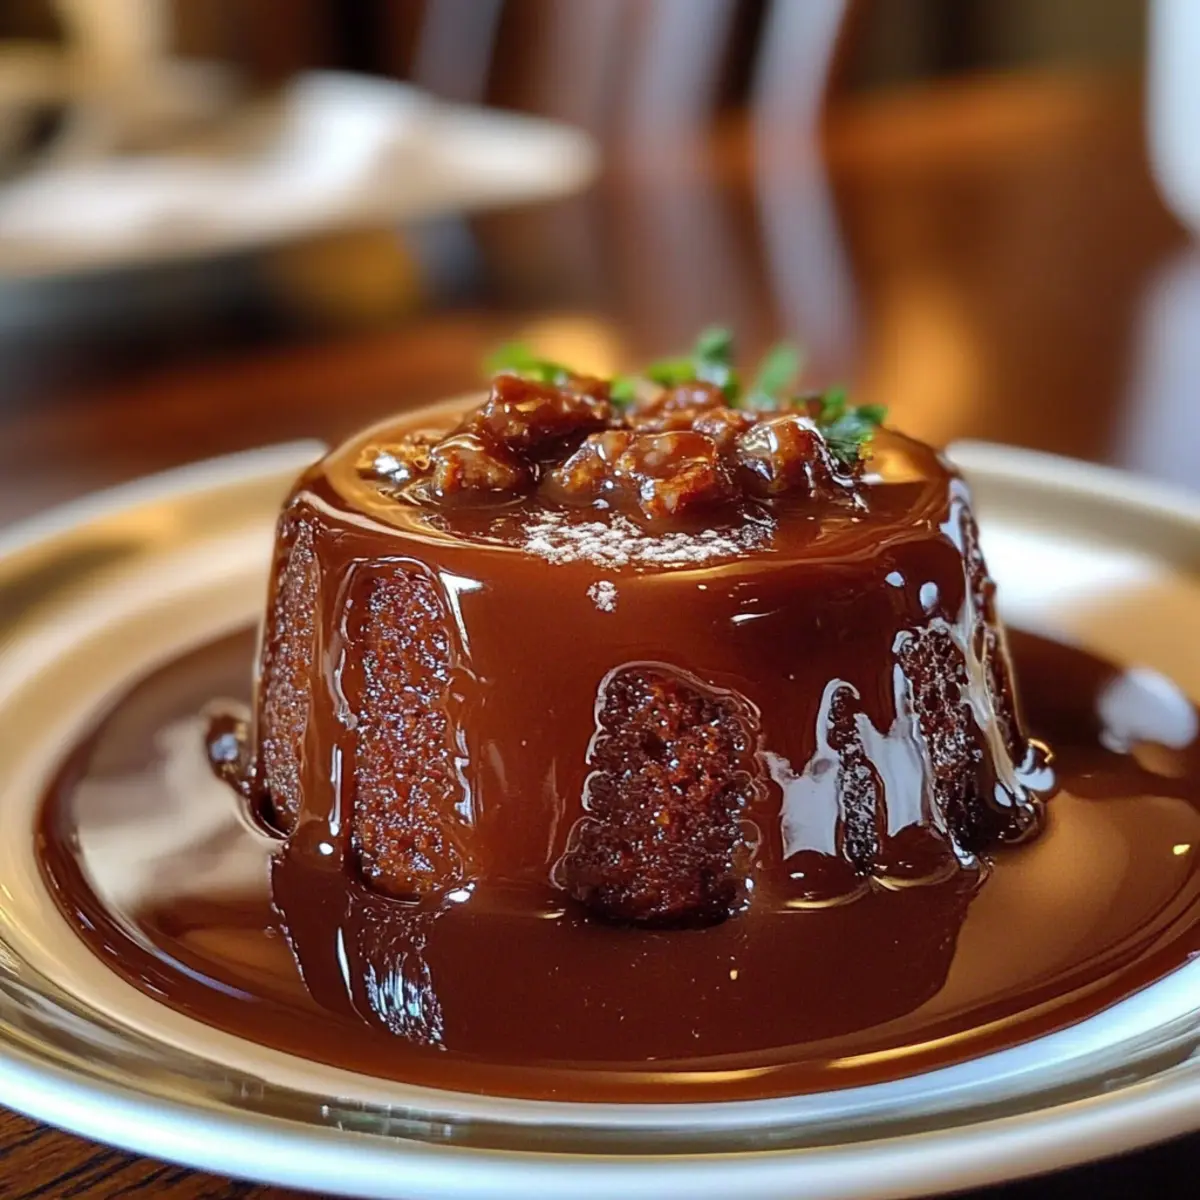
There's something magical about the aroma of Sticky Toffee Pudding wafting through the kitchen, bringing a sense of warmth and nostalgia that’s hard to resist. This beloved British dessert features a moist sponge cake infused with sweet Medjool dates and drenched in a luscious toffee sauce, making it a favorite for any sweet tooth. Not only is this recipe a comforting indulgence that creates a show-stopping finale for your dinner table, but it’s also surprisingly simple to whip up! Plus, it can be prepared ahead of time, allowing you to focus on enjoying time with loved ones. Are you ready to dive into this delightful journey of baking as we explore the steps to create your very own Sticky Toffee Pudding? Let's get started!

Why is Sticky Toffee Pudding So Loved?
Heavenly Aroma: The irresistible scent of toffee sauce fills your kitchen, evoking warmth and comfort.
Moist Texture: Medjool dates ensure an incredibly moist sponge that melts in your mouth.
Easily Customizable: Experiment with spices or add a pinch of sea salt to put a fun twist on this classic.
Perfect for Any Occasion: Ideal for festive gatherings or cozy nights, this dessert satisfies sweet cravings impressively.
Make-Ahead Convenience: Prepare it in advance and simply reheat to enjoy a warm serving without fuss. Dive into this indulgent dish to discover why many adore this traditional British dessert!
Sticky Toffee Pudding Ingredients
For the Pudding Base
• Medjool Dates – Provides natural sweetness and incredible moisture; Deglet Noor can be a suitable substitute.
• All-Purpose Flour – Offers structural integrity to the pudding; measure accurately to avoid a tough texture.
• Baking Powder & Baking Soda – Ensures a perfect rise and tenderness.
• Salt – Enhances flavor; be mindful to avoid overwhelming the sweetness.
• Butter – Creates a tender crumb; make sure it’s softened for the best results.
• Granulated Sugar – Adds sweetness and necessary structure to the cake.
• Eggs – Bind the ingredients and contribute to the cake’s delightful texture.
• Vanilla Extract – Adds depth and complexity to both the cake and sauce.
For the Toffee Sauce
• Heavy Cream – Forms the rich, velvety base for the toffee sauce that everyone loves.
• Dark Brown Sugar – Provides deep, molasses flavors essential for that authentic Sticky Toffee Pudding experience.
Now that you're equipped with the essential ingredients for a heavenly Sticky Toffee Pudding, let's dive into the method and bring this beloved British dessert to life!
Step‑by‑Step Instructions for Sticky Toffee Pudding
Step 1: Preheat the Oven
Begin by preheating your oven to 350°F (175°C). While the oven warms up, generously grease a baking dish or individual ramekins with butter to ensure the pudding releases easily after baking. This step is crucial for the perfect Sticky Toffee Pudding that will glide right out when it's time to serve.
Step 2: Prepare the Dates
Chop your Medjool dates into small pieces and transfer them to a bowl. Pour boiling water over the dates, adding a teaspoon of baking soda, and let them soak for 10 minutes. This soaking will soften the dates and enhance their natural sweetness, making your Sticky Toffee Pudding moist and flavorful.
Step 3: Mix Dry Ingredients
In a separate mixing bowl, whisk together the all-purpose flour, baking powder, and salt until well combined. This step aerates the flour and ensures that your Sticky Toffee Pudding will rise beautifully. Set the mixture aside to prepare for the wet ingredients, ensuring you have everything ready for a smooth batter.
Step 4: Cream Butter and Sugar
In a large mixing bowl, cream together the softened butter and granulated sugar using a hand mixer or stand mixer on medium speed for about 4-5 minutes, until the mixture is light and fluffy. This aeration is key to achieving a tender texture in your pudding. Gradually add the eggs one at a time, mixing well after each addition, followed by the vanilla extract.
Step 5: Combine Batters
Carefully fold in your soaked date mixture along with the water into the creamed butter and sugar mixture. Alternate adding the dry flour mixture in batches, mixing gently until just combined. Avoid overmixing to ensure your Sticky Toffee Pudding remains light and fluffy, while the dates provide pockets of sweetness throughout.
Step 6: Bake the Pudding
Pour the batter into your prepared baking dish, smoothing the top with a spatula. Bake in the preheated oven for 30-35 minutes or until the pudding is golden brown and springs back when lightly pressed in the center. The aroma filling your kitchen will hint at the delightful Sticky Toffee Pudding you’re eagerly awaiting.
Step 7: Prepare Toffee Sauce
As the pudding bakes, prepare the rich toffee sauce by combining heavy cream, dark brown sugar, and butter in a saucepan over medium heat. Stir until the mixture comes to a gentle simmer, allowing it to thicken for about 5-7 minutes. The sauce should be rich and glossy, a perfect complement to your warm pudding.
Step 8: Infuse the Pudding
Once the pudding is out of the oven, use a skewer or toothpick to poke several holes across the top. Pour half of the warm toffee sauce over the pudding, allowing it to soak in and enhance the flavor throughout. Let the pudding rest for 5-10 minutes to absorb the delicious sauce before serving.
Step 9: Serve and Enjoy
Cut generous portions of your Sticky Toffee Pudding and serve warm, drizzling the remaining toffee sauce over each piece. For an indulgent touch, offer vanilla ice cream or lightly sweetened whipped cream on the side. The combination of warm pudding and cool toppings creates a heavenly dessert experience that your loved ones will cherish.

Make Ahead Options
Sticky Toffee Pudding is a fantastic choice for meal prep, saving you significant time on busy weeknights. You can prepare the pudding batter up to 24 hours in advance by mixing all the ingredients and storing it in the refrigerator. To maintain quality, cover the bowl tightly to prevent moisture loss. If you want to prepare the toffee sauce ahead, it can be made and refrigerated for up to 3 days—just reheat gently on the stove before serving. When you’re ready to enjoy your Sticky Toffee Pudding, simply pour the batter into your baking dish, bake as directed, and then infuse with the warm toffee sauce. Before you know it, you’ll have a delicious dessert ready with minimal effort!
How to Store and Freeze Sticky Toffee Pudding
Fridge: Store leftover Sticky Toffee Pudding in an airtight container in the refrigerator for up to 4 days. Gently reheat in the oven or microwave before serving to maintain its moistness.
Freezer: For longer storage, wrap the pudding tightly in plastic wrap and then aluminum foil. It can be frozen for up to 3 months. Thaw overnight in the fridge before reheating.
Reheating: To reheat, place the pudding in a preheated oven at 350°F (175°C) for about 15-20 minutes. Drizzle some toffee sauce over the top before warming for an even more luscious result.
Quality Check: Always check for any signs of freezer burn or off odors before consuming; stored properly, your Sticky Toffee Pudding should retain its delightful flavors and textures.
Expert Tips for Sticky Toffee Pudding
-
Perfect Butter: Make sure your butter is softened to room temperature; this helps incorporate air and achieve a light, fluffy texture in the pudding.
-
Gentle Mixing: Be cautious not to overmix the batter once you've added the flour. This keeps your Sticky Toffee Pudding light and tender.
-
Poking Holes: Don't skip the step of poking holes in the pudding after baking; this allows the rich toffee sauce to seep in, enhancing flavor and moisture.
-
Check for Doneness: To know your pudding is ready, look for edges pulling away from the pan and a springy texture when gently pressed in the center.
-
Storage Tips: Store any leftover pudding tightly covered in the fridge for up to four days. Reheat gently in the oven to maintain its moistness.
What to Serve with Sticky Toffee Pudding
Delightful dishes enhance the experience of enjoying this indulgent dessert, creating a perfect, memorable meal.
-
Vanilla Ice Cream: The creamy, chilled ice cream balances the warm, rich pudding beautifully, creating a delightful contrast of temperatures. Every spoonful garners a heavenly complement of sweet creaminess.
-
Whipped Cream: Lightly sweetened whipped cream adds an airy texture, making each bite feel luxuriously indulgent. Its subtle sweetness harmonizes with the dessert's rich toffee flavors.
-
Fresh Berries: Juicy raspberries or blueberries introduce a refreshing tartness that cuts through the sweetness, providing a delightful balance to the dish. Their vibrant color also adds a beautiful touch to your plate.
-
Coffee: A warm cup of freshly brewed coffee enhances the toffee flavors while offering a comforting finish. The rich aroma of coffee complements the pudding's sweetness in a truly satisfying way.
-
Spiced Chai Tea: The warm spices in chai bring a unique twist, enriching the dessert experience with comforting flavors. Sip alongside for a cozy, inviting atmosphere.
-
Salted Caramel Sauce: Drizzling a bit of salted caramel elevates the indulgence factor even further, intensifying the sweet and salty contrast. This extra layer of flavor is truly decadent!
-
Candied Nuts: Crunchy candied nuts like pecans provide a delightful texture contrast and a touch of sweetness. Their nutty flavor complements the sticky sweetness of the toffee sauce perfectly.
-
Coconut Flan: For a twist, serving with a slice of creamy coconut flan introduces a different texture and flavor profile, creating an exotic sensation alongside the traditional dessert.
-
Chocolate Ganache: A small dollop of dark chocolate ganache can intensify the sweetness while adding a luscious layer of flavor. The combination of chocolate and toffee is irresistibly indulgent!
Sticky Toffee Pudding Variations
Feel free to get creative and personalize your Sticky Toffee Pudding with these delightful twists!
-
Salted Caramel: Add a pinch of sea salt to the toffee sauce for a savory-sweet contrast that enhances the overall flavor beautifully.
-
Spiced Delight: Incorporate warm spices like cinnamon or nutmeg into the batter for added depth, creating a cozy vibe perfect for chilly evenings.
-
Citrus Zest: Swap in orange or lemon zest for a refreshing brightness that awakens the dish, making it a lovely spring-time treat.
-
Nuts Galore: Mix in chopped walnuts or pecans for a delightful crunch. The added texture elevates the pudding experience with each bite.
-
Pumpkin Perfection: Use pumpkin puree instead of some butter in the batter for a seasonal spin that adds fall flavors and moisture.
-
Berry Bliss: Top your warm pudding with fresh berries like raspberries or strawberries for a vibrant finish that balances the sweetness.
-
Chocolate Twist: Fold in mini chocolate chips for a decadent twist that complements the toffee sauce, bringing a touch of luxury to this classic dessert.
-
Heat It Up: Add a pinch of cayenne pepper to the toffee sauce for a surprising kick, turning your pudding into a thrilling dessert experience.
Mix and match these variations to find your favorite combination! Remember, each unique tweak you make is a step toward crafting a Sticky Toffee Pudding that reflects your personal taste—what a delicious adventure! If you're looking for more ways to elevate your desserts, check out how to incorporate seasonal flavors into your baking. Explore Seasonal Ingredients. It’s all about making every dessert a celebration!
Sticky Toffee Pudding Recipe FAQs
How do I select the right dates for my Sticky Toffee Pudding?
Absolutely! When choosing Medjool dates, look for ones that are plump and have a slightly glossy skin without any dark spots. If you can’t find Medjool dates, Deglet Noor dates are a suitable alternative. They won’t be as sweet, but they can work well in the pudding.
What is the best way to store leftover Sticky Toffee Pudding?
To keep your Sticky Toffee Pudding fresh for up to 4 days, store it in an airtight container in the fridge. When you're ready to enjoy it again, simply reheat it gently in either the oven or microwave, making sure to maintain its moisture—nobody likes a dried-out pudding!
Can I freeze Sticky Toffee Pudding for later enjoyment?
Absolutely! To freeze, wrap the pudding tightly in plastic wrap, then in aluminum foil to prevent freezer burn. It can be stored for up to 3 months. When you’re ready to enjoy it, thaw the pudding in the fridge overnight before reheating. A quick reheat in a 350°F (175°C) oven for about 15-20 minutes will have it tasting fresh again!
What should I do if my pudding is too dense or doesn’t rise properly?
Very! If your Sticky Toffee Pudding comes out dense, it could be due to overmixing after adding the flour. Make sure to mix gently to keep that light, fluffy texture. If it didn’t rise well, check the freshness of your baking powder and baking soda; they should be active and effective for the best rise.
Are there any dietary considerations with Sticky Toffee Pudding?
Of course! This recipe is vegetarian-friendly, but if you're serving it to guests with allergies, be sure to mention ingredients like eggs for those allergic to them. For a dairy-free option, you can substitute the butter with a plant-based alternative and use coconut cream for the toffee sauce, but keep in mind this may alter the flavor slightly.

Indulgent Sticky Toffee Pudding That Will Melt Your Heart
Ingredients
Equipment
Method
- Preheat the oven to 350°F (175°C) and grease a baking dish or ramekins.
- Chop and soak Medjool dates in boiling water with a teaspoon of baking soda for 10 minutes.
- Whisk together flour, baking powder, and salt in a bowl.
- Cream softened butter and sugar until light and fluffy, then add eggs and vanilla.
- Fold in the date mixture and alternate with the dry ingredients until just combined.
- Pour the batter into the prepared dish and bake for 30-35 minutes until golden.
- While baking, prepare the toffee sauce by simmering cream, brown sugar, and butter until thickened.
- Poke holes in the baked pudding and pour half of the warm toffee sauce over it. Let rest for 10 minutes.
- Serve warm with remaining toffee sauce and optionally vanilla ice cream or whipped cream.


Leave a Reply