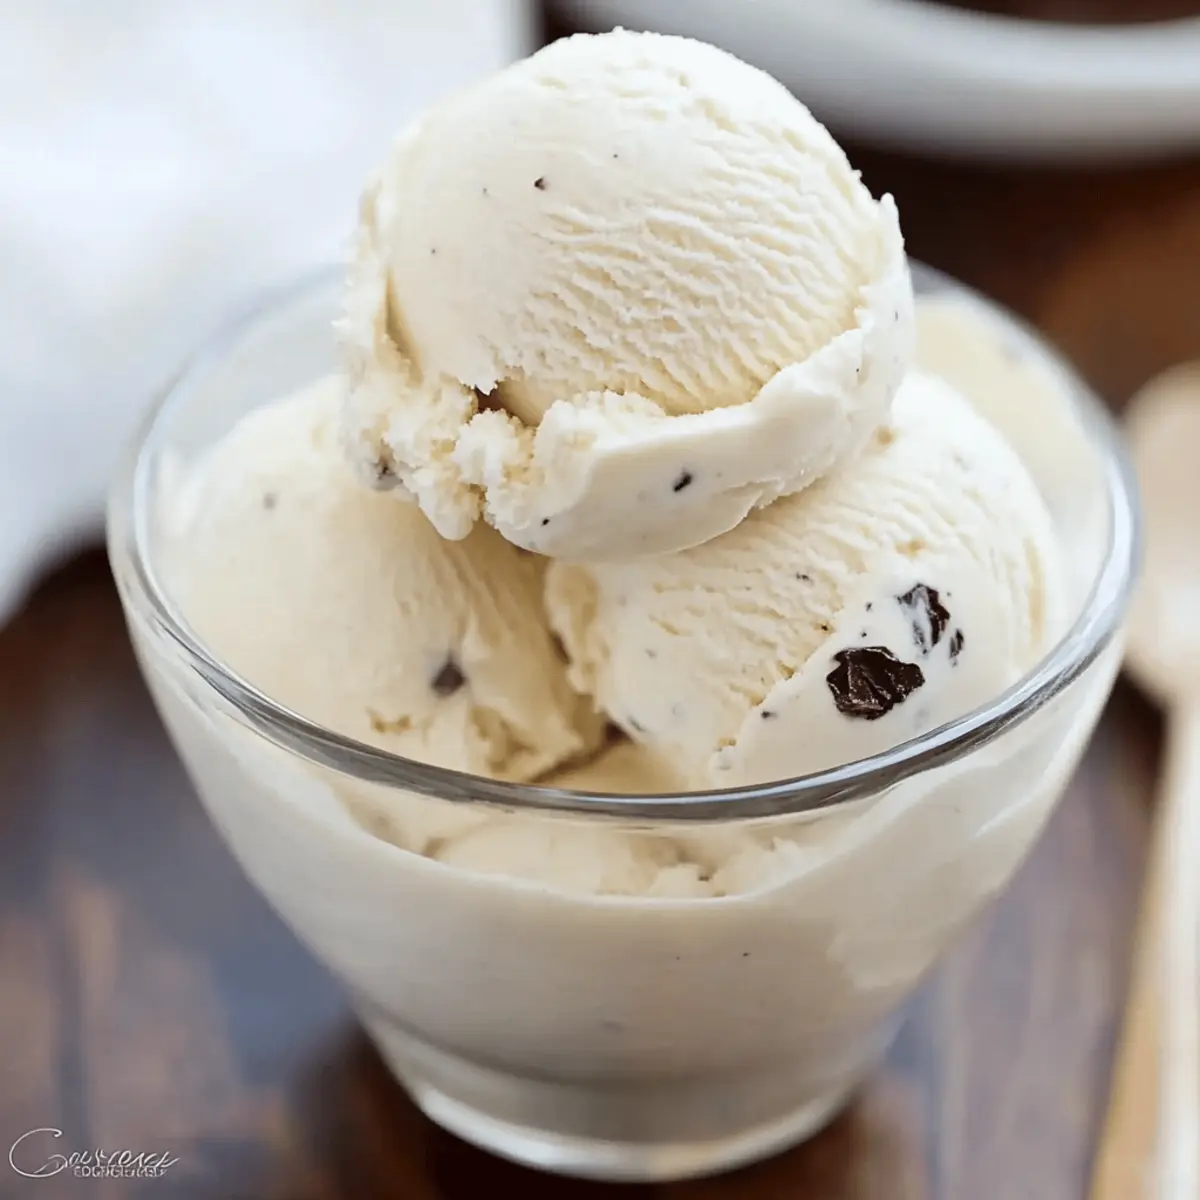
On a sweltering summer day, there’s nothing quite like the sheer joy of a cold, creamy dessert to lift your spirits. That’s exactly what my Creamy Greek Yogurt Ice Cream delivers! This homemade delight is not only a healthier alternative to traditional ice cream, but it also comes together in no time at all, making it the perfect addition to your warm weather repertoire. Packed with wholesome ingredients like Greek yogurt and drizzled with honey, this guilt-free treat promises to satisfy your sweet cravings while keeping your health goals intact. Plus, with endless opportunities for customization through your favorite mix-ins, you can make each batch uniquely yours. Curious to see how easy it is to whip up this summertime favorite? Let’s dive in!
Why is Greek Yogurt Ice Cream a Must-Try?
Creamy Texture: This Greek Yogurt Ice Cream boasts a wonderfully dense and velvety texture that rivals traditional recipes but is far lighter.
Quick and Simple: With just a handful of ingredients and minimal prep time, you can have a delicious homemade dessert that’s incredibly easy to whip up.
Guilt-Free Indulgence: Using Greek yogurt provides a protein boost and decreases sugar levels, making it a wholesome choice you can feel good about.
Endless Customization: Add your favorite mix-ins like fruit, nuts, or even cookie crumbles to create a personalized treat that fits your unique tastes.
Family-Friendly Fun: Everyone will love helping to make and customize this ice cream; it’s perfect for involving kids in the kitchen!
Health-Conscious Alternative: Looking for a nutritious dessert option? This frozen delight offers a satisfying solution without sacrificing flavor, making it a great addition to any summer menu.
Greek Yogurt Ice Cream Ingredients
• Get ready to create a delightful treat!
For the Base
- Greek Yogurt – A creamy foundation that also packs in protein; opt for full-fat for added richness.
- Peanut Butter – Adds creamy texture and flavor; feel free to swap with almond or sun butter for nut-free options.
- Honey – A natural sweetener that harmonizes the flavors; maple syrup or agave can be great substitutes.
- Vanilla Extract – Enhances the overall taste; always choose pure vanilla for the best flavor.
- Coconut Milk – Provides extra creaminess; coconut yogurt works well for a fully dairy-free ice cream experience.
For Mix-Ins
- Chopped Dark Chocolate – Gives a delightful crunch; consider fresh fruit, nuts, or sprinkles for variety.
- Fresh Berries – Bursting with flavor, they’re a refreshing and healthy addition for summer; use any berries you love!
- Banana Slices – Adds natural sweetness and pairs well with the creamy base; freeze the bananas for an extra frosty touch.
This Greek Yogurt Ice Cream is the perfect way to enjoy a healthier dessert while still feeling indulgent!
Step‑by‑Step Instructions for Greek Yogurt Ice Cream
Step 1: Strain Yogurt
Begin by placing your Greek yogurt into a fine mesh strainer over a bowl. Cover the strainer with a clean towel to avoid contamination and refrigerate for at least 4 hours or overnight. This process will enhance the consistency of your Greek Yogurt Ice Cream by removing excess moisture, leading to a thicker base.
Step 2: Mix Ingredients
Once the yogurt is strained, transfer it to a large mixing bowl. Add creamy peanut butter, honey, vanilla extract, and coconut milk to the bowl. Using an electric mixer or a whisk, blend the mixture until it is smooth and lump-free, about 2–3 minutes. This creates the deliciously creamy foundation for your Greek Yogurt Ice Cream.
Step 3: Add Mix-ins
Now it's time to get creative! Gently fold in your chopped dark chocolate or any preferred mix-ins like fresh berries or nuts into the yogurt mixture. Use a rubber spatula to ensure even distribution without overmixing, which could disrupt the creamy texture that makes this Greek Yogurt Ice Cream so delightful.
Step 4: Initial Freezing
Transfer your mixture into a suitable freezer-safe container and cover it with a lid or plastic wrap. Place it in the freezer and let it sit for about 45 minutes. This initial freezing step helps the mixture to start setting before you begin the stirring process for that perfect creamy texture.
Step 5: Stir Mixture
After the initial freeze, remove the container from the freezer. Using a spatula, thoroughly stir the mixture, breaking up any ice crystals that may have formed. This step is crucial for achieving a consistent texture in your Greek Yogurt Ice Cream—aim for about 2–3 minutes of vigorous stirring!
Step 6: Repeat Freezing & Stirring
Return the container to the freezer and let it chill for another 30 to 45 minutes. Then, repeat the stirring process every 30–45 minutes for a duration of 2 to 3 hours. This intermittent stirring helps to ensure your ice cream remains creamy and indulgent, without the icy texture typical of store-bought options.
Step 7: Serve or Store
Once you've achieved your desired consistency, it's time to serve! Scoop the creamy Greek Yogurt Ice Cream into bowls or cones for immediate enjoyment, or cover your container well and freeze for a firmer texture. This delightful treat can be stored in an airtight container for up to two weeks.
Make Ahead Options
These Creamy Greek Yogurt Ice Creams are perfect for busy home cooks! You can strain the Greek yogurt up to 24 hours in advance, allowing it to attain the desired thick consistency while you focus on other tasks. Additionally, you can mix the base ingredients (peanut butter, honey, vanilla extract, and coconut milk) and store them in the refrigerator for up to 3 days before combining them with the strained yogurt. When ready to serve, simply fold in your chosen mix-ins, freeze, and stir as per the recipe instructions to achieve that creamy texture. This way, you'll have a delicious and refreshing dessert with minimal effort, making your summer days all the more enjoyable!
Expert Tips for Greek Yogurt Ice Cream
-
Strain Well: Ensure you strain the yogurt overnight to achieve the thickest texture; watery yogurt leads to icy ice cream.
-
Mind the Mix-Ins: Add mix-ins gently to avoid interrupting the creamy texture of your Greek Yogurt Ice Cream; fold rather than stir vigorously.
-
Regular Stirring: Don’t skip on stirring during the freezing process; this step is vital to prevent the formation of ice crystals and ensures creaminess.
-
Taste as You Go: Adjust sweetness based on your personal preference; flavored Greek yogurt can change sweetness levels, so be flexible with honey.
-
Serve Softly: For the best scoopable texture, let the ice cream sit at room temperature for a few minutes before serving to soften slightly.
What to Serve with Creamy Greek Yogurt Ice Cream?
On a hot day, nothing enhances the joy of your homemade treat quite like a thoughtfully selected side that complements its creamy richness.
-
Fresh Berries: The bright, tart flavor of fresh berries contrasts beautifully with the creamy sweetness, adding a refreshing burst to each bite.
-
Chocolate Sauce: A drizzle of warm chocolate sauce creates an inviting contrast, giving a decadent touch that makes this dessert feel extra indulgent.
-
Nutty Granola: A sprinkle of crunchy granola introduces a delightful texture and nutty flavor that pairs perfectly with the smooth ice cream.
-
Mint Leaves: The refreshing, aromatic bite of fresh mint elevates the overall flavor, providing a delightful herbaceous note that's invigorating and appealing.
-
Coconut Flakes: Toasted coconut flakes offer a tropical twist, adding a chewy texture and a hint of coconut flavor to every scoop.
-
Honey Drizzle: A simple drizzle of honey can enhance the sweetness while reinforcing that natural, wholesome goodness of Greek yogurt.
-
Almonds: Chopped almonds create a satisfying crunch that complements the creaminess of the ice cream, adding both flavor and nutrition.
-
Coffee: For adults, a shot of espresso or cold brew coffee on the side can enhance the dessert experience, creating a delightful gourmet pairing.
Each of these options will make your creamy Greek yogurt ice cream shine even brighter, transforming a simple dessert into a delightful culinary indulgence!
Greek Yogurt Ice Cream Variations
Feel free to personalize your Greek Yogurt Ice Cream adventure by testing out these fun and creative twists!
-
Nut-Free Delight: Swap peanut butter for sunflower seed butter to enjoy a tasty nut-free version.
-
Vegan Option: Use coconut yogurt instead of Greek yogurt and maple syrup in place of honey for a full vegan treat. This twist ensures everyone can join in on the creamy fun!
-
Tropical Flavor: Add shredded coconut and pineapple chunks for a tropical-inspired ice cream that transports you straight to a sunny beach.
-
Spicy Kick: Mix in a pinch of cayenne pepper or some chopped jalapeños for a surprising zesty heat that tantalizes the taste buds!
-
Berry Bliss: Fold in a combination of fresh strawberries, blueberries, and raspberries for a vibrant, fruity explosion in each scoop.
-
Chocolate Mint: Incorporate peppermint extract and crushed mint candies for a refreshing take that chocolate lovers will adore!
-
Homemade Crunch: Add crumbled homemade granola or cereal for a satisfying texture contrast that elevates each bite.
-
Cookie Dough Dreams: Mix in chunks of edible cookie dough for a delightful nostalgic treat that brings back childhood memories.
Remember, the beauty of this recipe is in its adaptability, so don’t hesitate to experiment and find your perfect flavor combination! You might also want to explore serving your ice cream alongside some of your favorite homemade toppings like our crispy baked churros or decadent chocolate sauce for a fully indulgent experience.
How to Store and Freeze Greek Yogurt Ice Cream
Airtight Container: Store your Greek Yogurt Ice Cream in an airtight container to prevent freezer burn, keeping it fresh for up to two weeks.
Freezer: For the best texture, keep the ice cream in the coldest part of the freezer and avoid frequent temperature changes.
Reheating: If it becomes too hard, let the ice cream sit at room temperature for about 10 minutes before scooping to soften.
Mix-ins Strategy: If you add fresh fruits or delicate mix-ins, consume within 3–5 days for optimal flavor and freshness.

Greek Yogurt Ice Cream Recipe FAQs
How do I choose the best Greek yogurt for this recipe?
Absolutely! When selecting Greek yogurt, look for a full-fat or whole-fat option for the creamiest texture in your ice cream. Check the ingredient list—aim for brands with minimal additives or sweeteners, as this will enhance the natural flavor and richness of your homemade Greek Yogurt Ice Cream.
How long can I store Greek Yogurt Ice Cream in the freezer?
You can keep your Greek Yogurt Ice Cream in an airtight container in the freezer for up to two weeks. After this period, it may start to lose its creamy texture, so it's best enjoyed fresh! Also, if you notice any ice crystals forming, give it a good stir to reintroduce air and improve the consistency.
Can I freeze Greek Yogurt Ice Cream for longer than two weeks?
While it’s possible to freeze Greek Yogurt Ice Cream for up to three months, I recommend consuming it within the two-week mark for the best flavor and texture. When freezing for an extended period, store it in the coldest part of your freezer and make sure it’s well-sealed to avoid freezer burn.
What should I do if my ice cream turns out too icy?
Very! If your Greek Yogurt Ice Cream is icy instead of creamy, it may be due to not stirring enough during the freezing process. To fix this, remove the ice cream from the freezer, let it soften at room temperature for about 10 minutes, and then stir vigorously to break up the ice crystals. Return it to the freezer and aim to stir every 30-45 minutes to maintain that smooth texture.
Are there any dietary considerations for making Greek Yogurt Ice Cream?
Definitely! If you're concerned about allergies, be mindful of the type of nut butter you choose. For nut allergies, I recommend opting for sunflower seed butter as a great nut-free alternative. Additionally, you can use dairy-free yogurt or coconut yogurt for a vegan version, ensuring everyone can enjoy this delightful treat!
Can I add fresh fruits to my Greek Yogurt Ice Cream?
Absolutely! Fresh fruits like berries or banana slices not only enhance flavor but also add a delightful texture. However, for optimal freshness, consume the ice cream within 3-5 days of adding fresh fruits, as they can start to ferment and change the overall taste while in the freezer.
Creamy Greek Yogurt Ice Cream for a Guilt-Free Indulgence
Ingredients
Equipment
Method
- Begin by placing your Greek yogurt into a fine mesh strainer over a bowl. Cover the strainer with a clean towel and refrigerate for at least 4 hours or overnight.
- Once the yogurt is strained, transfer it to a large mixing bowl. Add peanut butter, honey, vanilla extract, and coconut milk. Blend until smooth and lump-free, about 2–3 minutes.
- Gently fold in your chopped dark chocolate, fresh berries, or other mix-ins into the yogurt mixture using a rubber spatula.
- Transfer the mixture to a freezer-safe container and cover it. Place in the freezer for about 45 minutes.
- After the initial freeze, remove the container and stir vigorously for about 2–3 minutes to break up any ice crystals.
- Return to the freezer, let it chill for another 30 to 45 minutes, then repeat the stirring process every 30–45 minutes for 2 to 3 hours.
- Once the desired consistency is achieved, serve the ice cream or store it in an airtight container for up to two weeks.


Leave a Reply