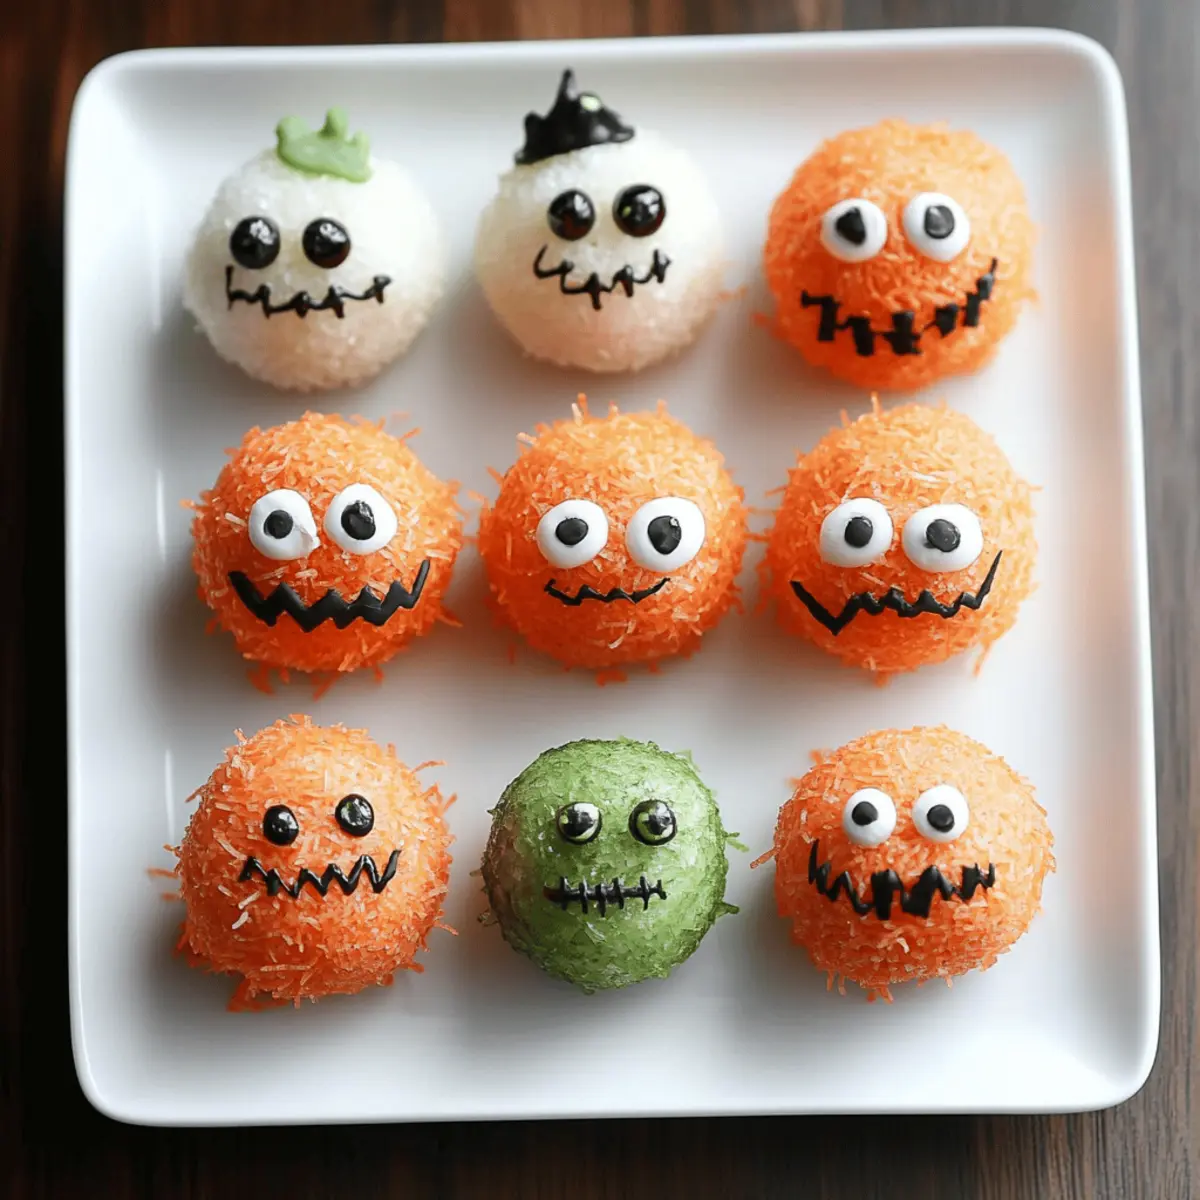
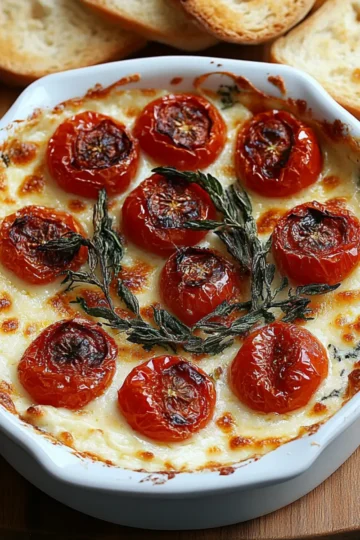
As the glow of Halloween creeps closer, I find myself craving a dish that feels both festive and fun. Enter the Halloween Sushi Balls, a creative twist on traditional sushi that’s perfect for gatherings and little ones. This playful appetizer invites your imagination, allowing you to customize each ball with vibrant toppings and spooky decorations, making it a delightful addition to your Halloween festivities. Not only are these sushi balls a crowd-pleaser, but they're also surprisingly easy to whip up—perfect for those busy pre-party hours. Plus, with options for various fillings, they cater to any dietary need, ensuring everyone can join in the fun. Ready to roll up some spooky bites that will thrill your guests? Let's dive into this recipe!
Why Are Halloween Sushi Balls So Fun?
Festive Appeal: These Halloween Sushi Balls are not just appetizers; they’re a whimsical treat that brings the spirit of Halloween to your table.
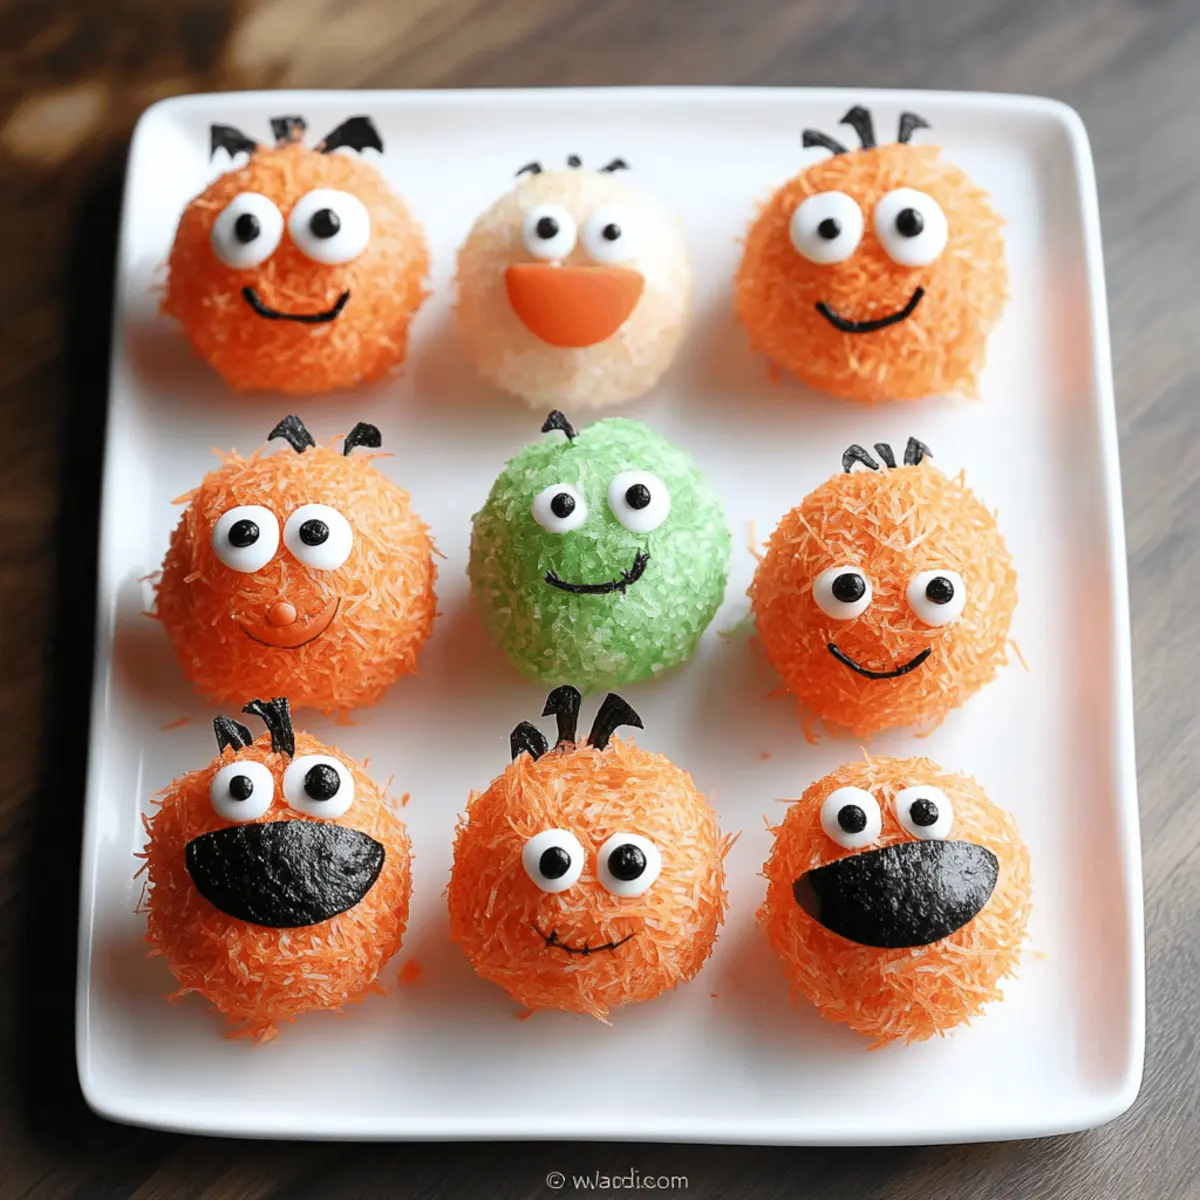
Customizable Delight: With a variety of toppings and fillings, you can make them your own. Try using different veggies or proteins that reflect your personal taste!
Kid-Friendly Fun: Perfectly sized for little hands, these sushi balls make for an entertaining cooking project for families—kids will love helping to decorate them!
Quick to Prepare: You can whip up these sushi balls in no time, making them an ideal pre-party snack. Your guests will be impressed with your creativity, but you’ll know how easy it was!
Healthy Twist: Packed with nutritious ingredients, these sushi balls offer a tasty, wholesome alternative to traditional party snacks. Combine flavors and textures as you please!
Treat your guests to these delicious bites, and don’t forget to check out my other Halloween-themed recipes like spooky pumpkin soup and creepy crawly cupcakes for a frightfully tasty meal!
Halloween Sushi Balls Ingredients
For the Sushi Rice
• Sushi Rice – This is the foundation for our Halloween Sushi Balls; remember to use short-grain rice for that perfect sticky texture.
• Vinegar – Adds tanginess; you can adjust the amount according to your taste preference.
• Sugar – Balances the acidity in the rice for a delightful flavor.
• Salt – Enhances the overall taste; adjust to your liking.
For the Filling
• Smoked Salmon – Rich in flavor and healthy fats; a great protein option.
• Avocado – Offers creaminess and is a wonderful substitute for those who prefer plant-based options.
For the Toppings
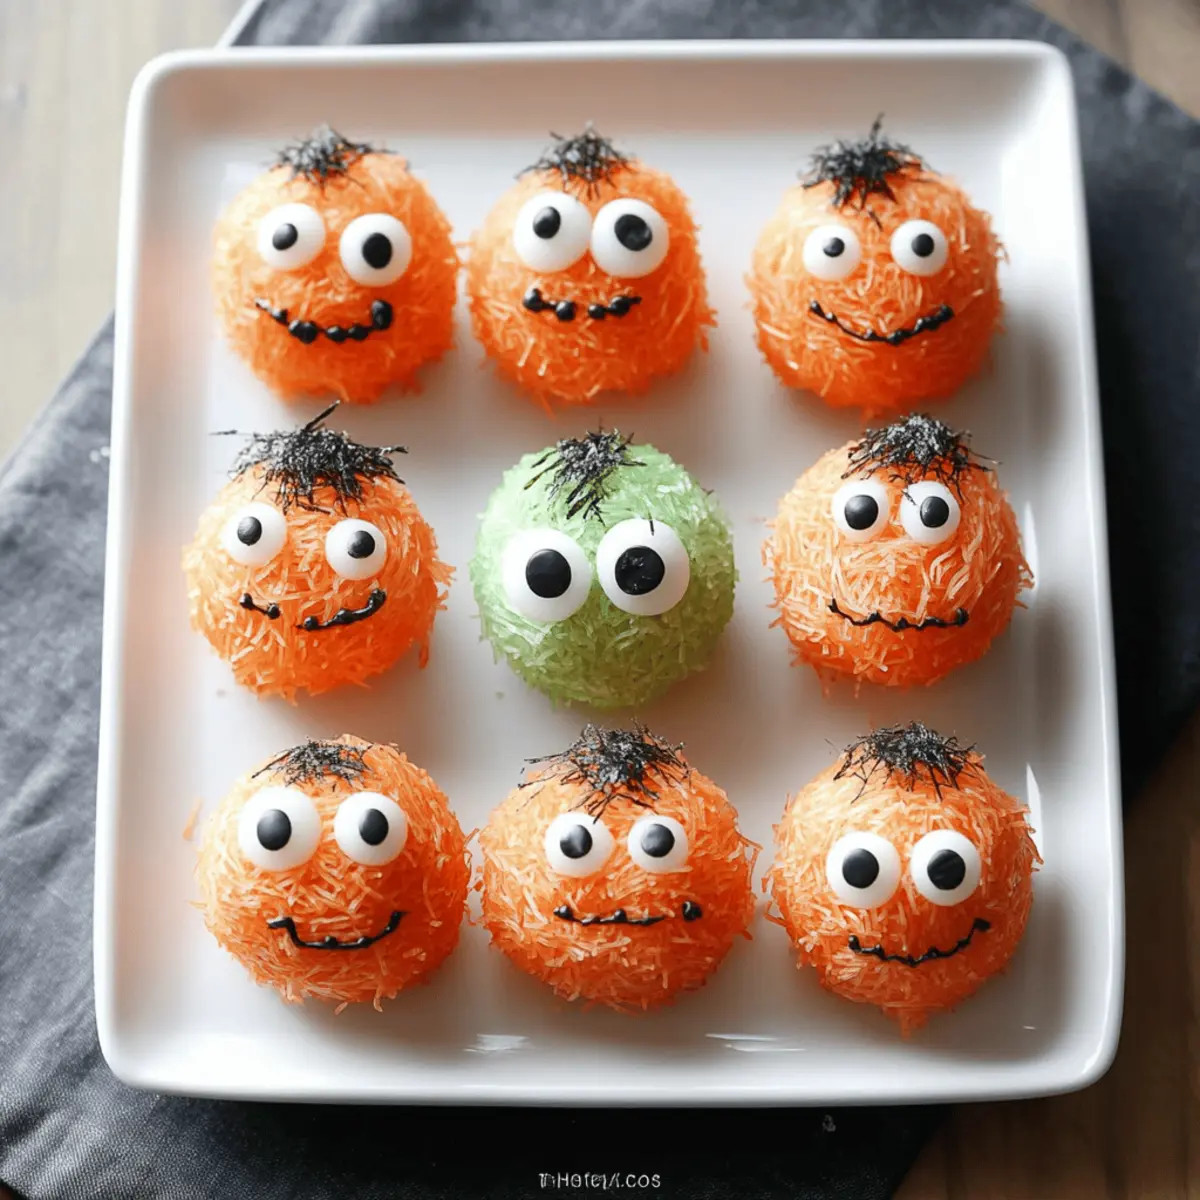
• Vegetable Toppings (carrots, kale, cucumber) – Provide a fresh crunch and a burst of color; feel free to use any veggies you have handy.
• Roasted Sesame Seeds – Adds a nutty flavor and a crunchy texture; you can swap with crushed nuts for a different twist.
For Decoration
• Nori Strips – Perfect for creating spooky eyes or jaws; they’re optional but add a fun visual element to your sushi balls.
Get ready to roll out a spooktacular treat with these Halloween Sushi Balls that are sure to captivate your guests!
Step‑by‑Step Instructions for Halloween Sushi Balls
Step 1: Prep the Rice
Begin by rinsing 2 cups of sushi rice under cold water, scrubbing gently until the water runs clear—this can take about 5 minutes. Then cook the rice in a rice cooker or on the stovetop with 2 ½ cups of water for approximately 20 minutes. Once done, let it steam for another 10 minutes off the heat, allowing it to become fluffy and sticky, perfect for your Halloween Sushi Balls.
Step 2: Season the Rice
While the rice is warm, prepare the seasoning by mixing ¼ cup of vinegar, 2 tablespoons of sugar, and 1 teaspoon of salt in a small bowl until dissolved. Gently fold this mixture into the rice using a wooden spoon or spatula, being careful not to mash the grains. Fluff the rice lightly as you mix, then allow it to cool to room temperature, making it easier to handle as you shape your Halloween Sushi Balls.
Step 3: Shape the Sushi Balls
Lay a piece of plastic wrap on a clean surface and scoop about 2 tablespoons of seasoned sushi rice onto the center. Place a slice of your chosen filling, such as smoked salmon or avocado, in the middle, and gather the edges of the plastic wrap to form a ball. Gently twist the wrap to shape the rice into a neat ball about 1½ inches in diameter. Repeat with the remaining rice and fillings to create your festive Halloween Sushi Balls.
Step 4: Decorate
Take each formed sushi ball and roll it in your choice of shredded vegetables, such as carrots and kale, or sprinkle with roasted sesame seeds, pressing lightly to ensure they stick. For added fun, use nori strips to make eyes and mouths to decorate your sushi balls, transforming them into playful spooky treats that are sure to delight both kids and adults alike.
Step 5: Serve with Dips
Transfer your Halloween Sushi Balls onto a decorative platter, and don’t forget to include dips for a complete experience. Soy sauce, wasabi, and pickled ginger not only enhance flavors but add to the festive atmosphere of your gathering. Enjoy the creative process and watch your guests marvel at these delightful Halloween Sushi Balls!
Storage Tips for Halloween Sushi Balls
Fridge: Store any leftover Halloween Sushi Balls in an airtight container with a damp paper towel on top to maintain moisture. They are best consumed within 24 hours for optimal texture.
Freezer: For longer storage, freeze sushi balls individually on a baking sheet before transferring them to an airtight container or freezer bag. Enjoy within 1 month for the best taste.
Reheating: If serving leftovers, let them come to room temperature instead of microwaving, as heating can affect the rice’s unique consistency.
Room Temperature: If serving at a party, keep them out for no more than 2 hours to ensure they stay fresh and safe for your guests.
Halloween Sushi Balls Variations & Substitutions
Let your creativity run wild as you customize these Halloween Sushi Balls to suit your preferences!
-
Vegan Option: Substitute smoked salmon with marinated tofu or tempeh for a hearty, plant-based filling. This option doesn’t skimp on flavor or texture!
-
Spicy Kick: Add sriracha or spicy mayo to your avocado or tuna filling for a delightful heat that’ll please spicy food lovers at your table.
-
Different Rice: Try using quinoa or cauliflower rice for a gluten-free or lower-carb twist; both options can bring unique textures to your sushi balls.
-
Nutty Crunch: Replace roasted sesame seeds with crushed peanuts or almonds for that extra crunch and robust flavor that complements various fillings beautifully.
-
Holiday Twist: Incorporate seasonal ingredients like roasted butternut squash or cranberries for a fall twist that’s not just Halloween-themed but festive through Thanksgiving!
-
Herbed Flavor: Mix fresh herbs like cilantro or basil into your rice for a fresh, aromatic enhancement that will brighten the overall taste.
-
Piquant Zest: Drizzle a little lime juice over the fillings for a zesty pop that lifts the flavors and makes each bite sing.
While you’re enjoying your sushi-making adventure, consider pairing your Halloween Sushi Balls with some lighter fare like Asian slaw or perhaps some spooky pumpkin soup to complement the seasonal theme! Indulge in the fun of creating a truly personalized Halloween experience!
What to Serve with Halloween Sushi Balls
As you prepare these spooky bites, consider rounding out your meal with delightful sides and drinks that complement their playful nature.
-
Edamame Pods: Lightly salted, these tender and nutritious beans add a satisfying crunch, perfect for nibbling between sushi balls.
-
Miso Soup: A warm and savory addition, miso soup provides umami richness and balances the vibrant flavors of the sushi balls.
-
Asian Slaw: Bright, crunchy, and tangy, this slaw made with cabbage and carrots adds refreshing contrast to the sushi's textures.
-
Cucumber Salad: Crisp cucumbers drizzled with rice vinegar offer a light, refreshing palate cleanser that pairs beautifully with the sushi balls.
-
Soy Sauce Dips: Create an assortment of dipping sauces like soy or teriyaki sauce; these enhance the enjoyment of each bite with added flavor.
-
Sake or Green Tea: Serve chilled sake or a warm cup of green tea alongside to complete the experience, enhancing the meal's festive feel.
Bring your Halloween gathering to life with these creative pairings that will thrill your guests and make every bite a treat!
Make Ahead Options
These Halloween Sushi Balls are perfect for meal prep, allowing you to save time on busy party days! You can prepare the sushi rice and season it up to 24 hours in advance, just be sure to store it in an airtight container at room temperature to maintain its moisture. For even more convenience, you can shape the sushi balls and refrigerate them for up to 3 days before your event. When it’s time to serve, simply decorate the balls with toppings and nori strips, then pair them with dips for a delightful presentation. Trust me, these make-ahead Halloween Sushi Balls will be just as delicious and fun to enjoy!
Helpful Tricks for Halloween Sushi Balls
- Perfectly Rinse the Rice: Rinsing properly ensures the sushi rice isn’t too mushy. Aim for the water to run clear for optimal stickiness.
- Season at the Right Temperature: Always season the rice while it’s warm; this helps the flavors absorb better, creating the ideal foundation for your Halloween Sushi Balls.
- Plastic Wrap Magic: Use plastic wrap to shape the sushi balls; it keeps your hands clean and helps create a perfect sphere without too much pressure.
- Diverse Fillings: Feel free to mix and match fillings! Using a variety not only caters to different tastes but also makes your Halloween Sushi Balls visually exciting.
- Stay Away from the Microwave: Avoid reheating leftovers. Instead, let them come to room temperature to maintain their delightful texture and flavor.

Halloween Sushi Balls Recipe FAQs
What type of rice should I use for Halloween Sushi Balls?
Absolutely, it’s best to use short-grain sushi rice! This variety provides the necessary stickiness for shaping your sushi balls nicely and ensures they hold together well.
How should I store leftover Halloween Sushi Balls?
Store any leftover Halloween Sushi Balls in an airtight container with a damp paper towel on top to help maintain moisture. They’re best enjoyed within 24 hours for optimal texture, but can handle up to 3 days in the refrigerator.
Can I freeze Halloween Sushi Balls?
Yes! To freeze, place the shaped sushi balls individually on a baking sheet and freeze until solid. Once frozen, transfer them to an airtight container or freezer bag. They can be kept in the freezer for up to 1 month. When you’re ready to eat, let them thaw in the fridge overnight and enjoy at room temperature!
What can I do if my sushi rice is too mushy?
If you find your sushi rice is too mushy, it may be due to over-rinsing or cooking. To fix this, try spreading the rice out on a baking sheet to cool and dry out a bit before shaping. Make sure to rinse thoroughly to ensure the water runs clear next time; this helps achieve the perfect texture.
Are Halloween Sushi Balls safe for food allergies?
Very! If you’re catering to allergies, always make sure to check the ingredients in your fillings and toppings. For instance, using avocado or tofu instead of smoked salmon can cater to those avoiding fish. Always double-check for potential cross-contamination if serving people with food allergies.
Can I customize the toppings for Halloween Sushi Balls?
Definitely! The more, the merrier! You can use any fresh vegetables you have on hand—like bell peppers or zucchini—along with different proteins. Embrace your creativity and personalize each sushi ball to match your festive theme and taste preferences!
Easy Halloween Sushi Balls: A Fun Twist on Tradition
Ingredients
Equipment
Method
- Rinse sushi rice under cold water until water runs clear. Cook in rice cooker or stovetop with 2 ½ cups of water for 20 minutes, then steam for 10 minutes off heat.
- While rice is warm, mix ¼ cup vinegar, 2 tablespoons sugar, and 1 teaspoon salt until dissolved and fold into rice.
- Place 2 tablespoons of sushi rice on plastic wrap, add filling, and shape into a ball around 1½ inches in diameter.
- Roll each ball in shredded vegetables or sesame seeds, using nori strips for decoration if desired.
- Serve on a platter with dips like soy sauce, wasabi, and pickled ginger.


Leave a Reply